GiveWP is a versatile WordPress plugin designed to streamline the process of accepting donations, managing donor information, and generating comprehensive reports. It caters to a wide range of organizations, including charities, churches, and political campaigns, offering a secure and user-friendly platform for fundraising efforts.

With customizable donation forms, automated tax receipts, and options for one-time or recurring donations, GiveWP provides flexibility to suit various fundraising needs.
Why should you use GiveWP?

GiveWP is a WordPress add-on that allows you to contribute a variable amount on the website that supplies this button. There are several plans available for this donation plugin, but it is extremely advantageous for any business or website looking to generate donations.
Priority assistance is provided to those who hold an active license for one of GiveWP’s Add-ons or Pricing Plans.
The platform provides email-based support to its Premium Add-on subscribers, with an average initial response time of 2 to 4 hours and an average time to resolution of 24 to 48 hours, depending on the intricacy of the issue.
Benefits of GiveWP
There are various benefits of using the GiveWP WordPress donation platform, as mentioned below.
- User-Friendly Interface
- Customizable donation forms
- Multiple Payment Gateways
- Recurring Donations
- Automated Tax Receipts
- Donor Management
- Advanced Reporting
- Multi-channel donation collection
- Customizable Thank-You Pages
- Cover Fees Option
GiveWP Features
GiveWP is a popular WordPress donation plugin that offers several options to help you manage your donations more efficiently. GiveWP features custom forms and recurring donations, so you have all you need to start your contribution campaigns.
GiveWP’s unique features, some of which are described below, make it the preferred choice for NGOs and other organizations looking to raise money online.
Customizable Donation Forms
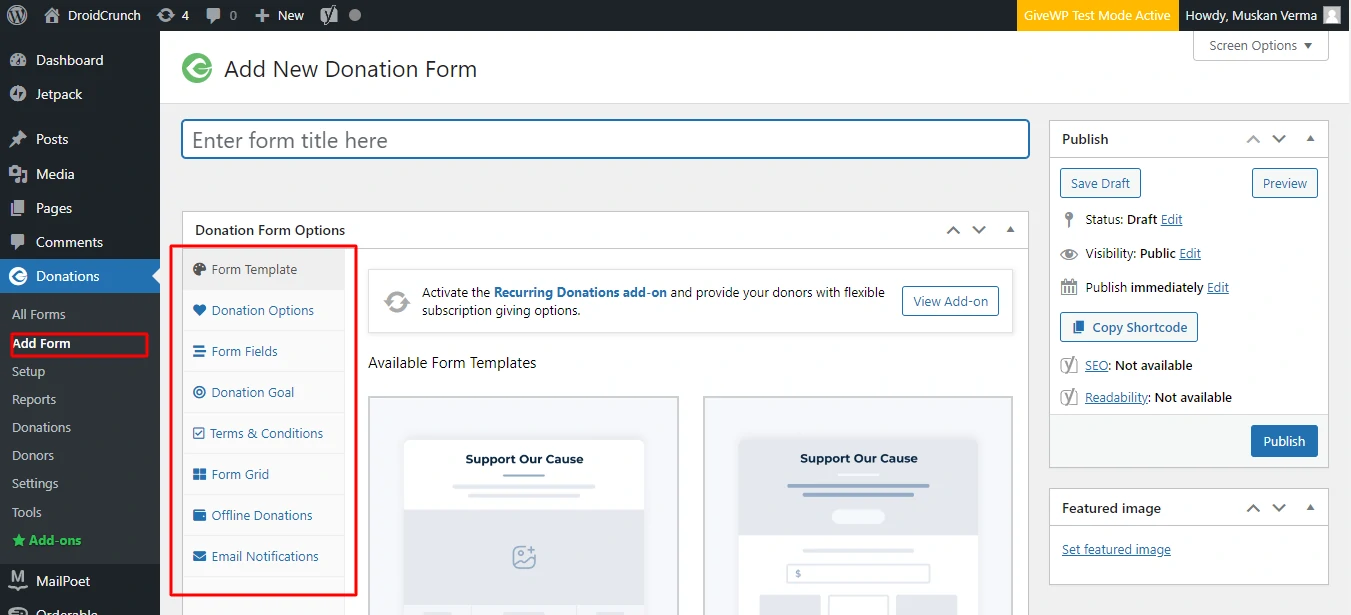
You may modify your contribution forms with GiveWP to meet your business’s requirements. You may set up multi-level contributions, add custom fields, and even add recurring donation choices. This makes it simple to modify the contribution procedure to meet your unique needs.
Additionally, you may alter the way your forms appear and feel, enabling you to coordinate them with your company’s logo. This makes sure that the donation process is simple and fun for your supporters.
Flexible Recurring Donations
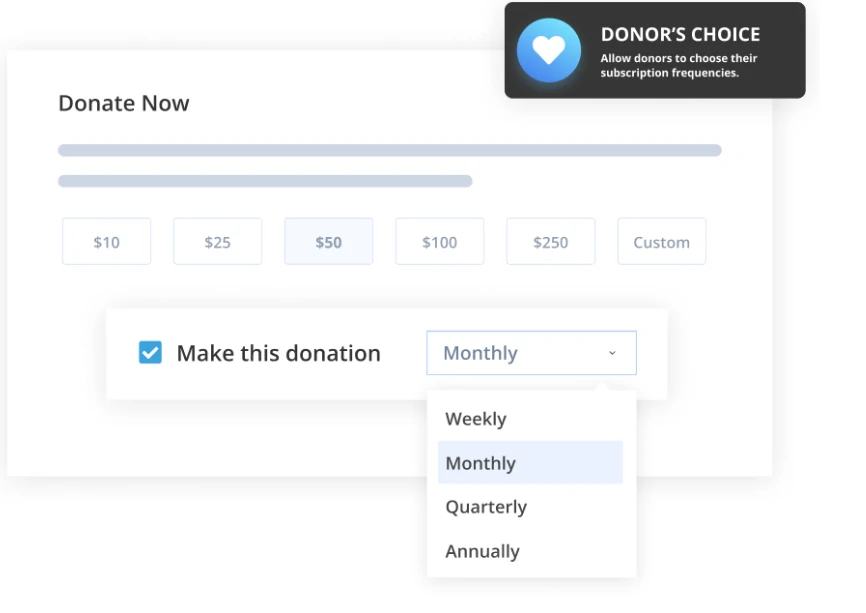
GiveWP makes it easy to set up and manage recurring donations. Its flexible recurring contribution feature allows you to offer supporters the option to donate weekly, monthly, or annually. This is a great way to guarantee that your supporters donate to your cause regularly.
You may also change the frequency and amount of donations to give your contributors more control over their contributions. You will keep the interests of your contributors and build relationships with them by doing this. GiveWP offers both the admin’s choice and the donor’s choice of recurring contribution options.
- Donor’s Choice: By offering donors the option to choose their subscription terms, the Donor’s Choice feature provides them total control over how often they donate.
- Admin’s Choice: Donors are forced to make donations during the periods you choose with this feature. This is a great way to ensure that your supporters will keep sending you money regularly.
Powerful Donor Management
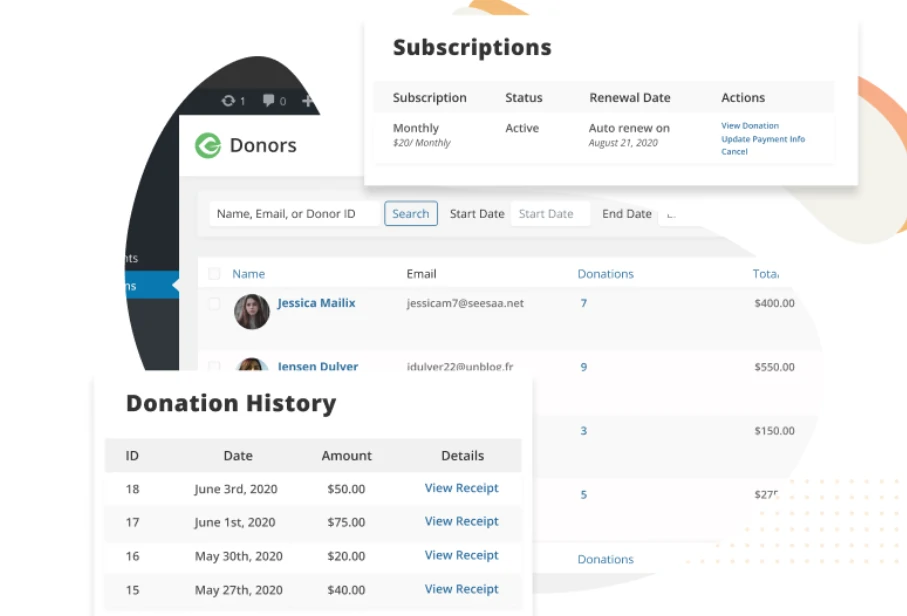
GiveWP’s efficient donor management system simplifies the process of managing your contributors and gifts. You may easily view and manage all of your donors, contributions, and regular subscriptions in one place. Furthermore, you can utilize the donor management system to automatically send emails to your donors informing them of the progress of your fundraising efforts or just thanking them for their donations.
As a result, you’ll be able to keep your donors interested in what you do by building relationships with them. To find out more about your campaigns, you may also merge donor management data with popular third-party programs like Salesforce, Zapier, and MailChimp.
GiveWP Pricing
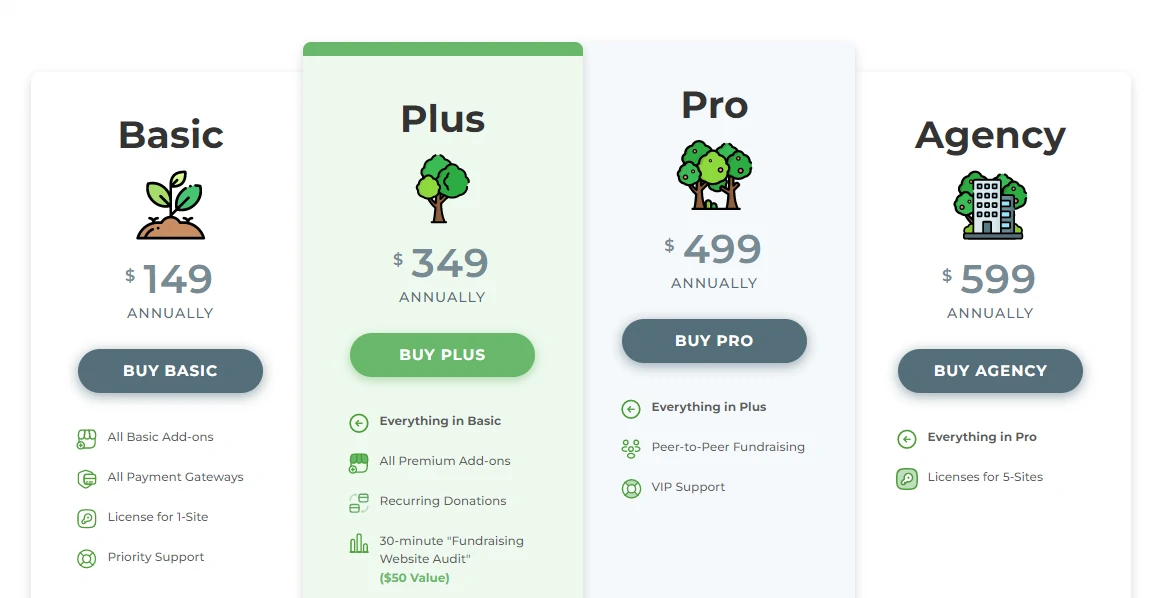
- Basic: $149
- Plus $349
- Pro: $499
- Agency: $599
- Basic: $149 per year for a single site license. includes payment gateways, priority support, and all essential extras.
- Plus: 1 site license for $349 each year. All paid add-ons, recurring payments, and fundraising website audits are included with Basic Plus.
- Pro: $499 per year for a single site license. Peer-to-peer fundraising, VIP assistance, and everything in Plus.
- Agency: $599 per year. You may utilize all of the pro features for up to 5 site licenses.
GiveWP Pros And Cons
Pros
- User-Friendly Interface
- Customizable Donation Forms
- Multiple Payment Gateways
- Reporting and Analytics
- Integrations
- Support and Documentation
- Add-ons
Cons
- Cost of Add-ons
- Learning Curve for Advanced Features
- Performance Issues
How to Use the GiveWP Plugin?
Step 1: Install and activate the GiveWP Plugin’s free version.
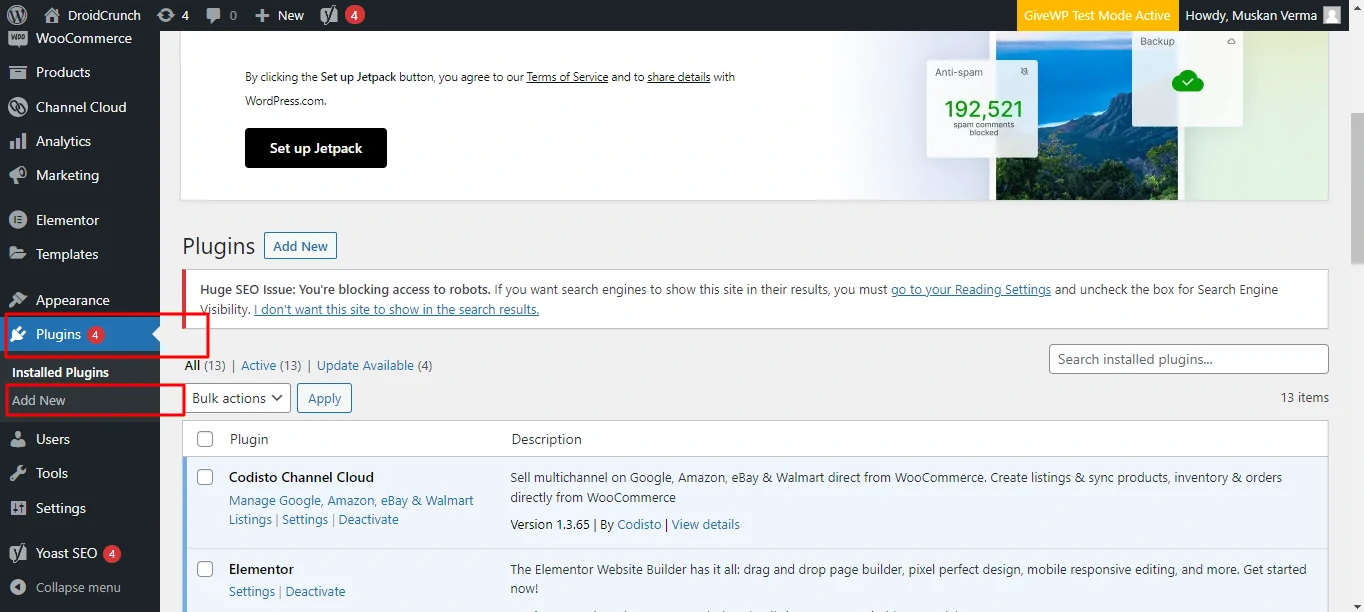
To start installing the GiveWP plugin, you must first log in to your WordPress dashboard. Click Plugins, then Add New on the left side menu, as seen in the figure below.
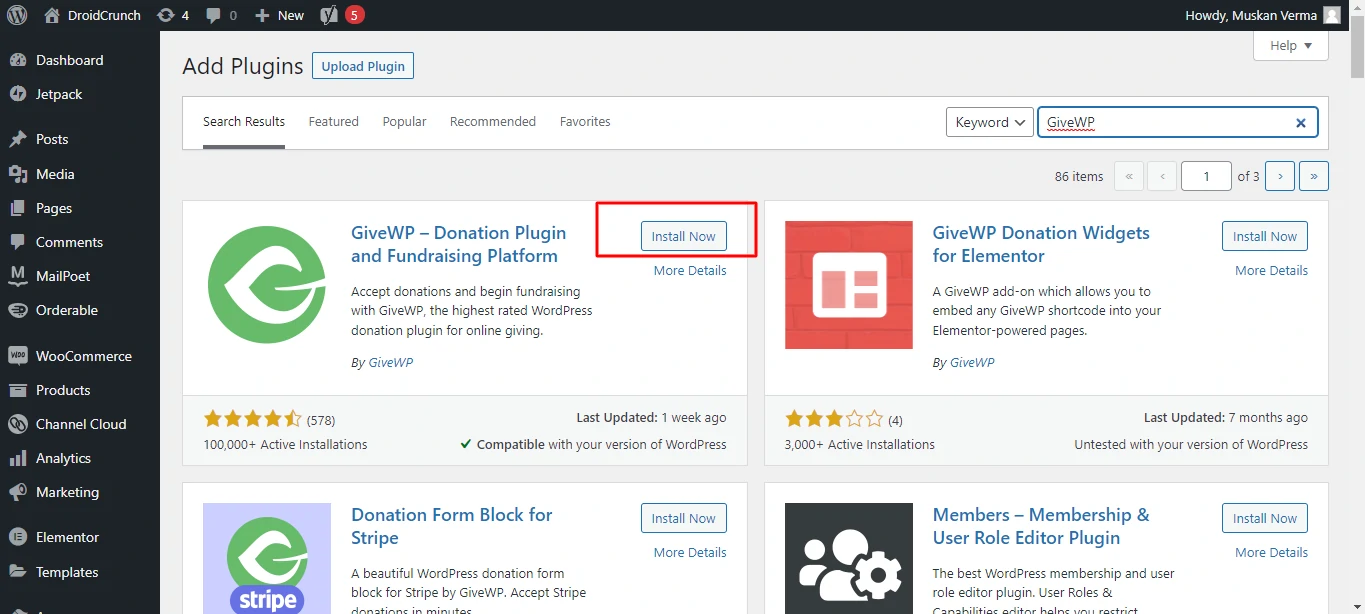
Now, on the right side, you’ll notice a search box where you may put ‘GiveWP‘. Simply click the ‘Install‘ button once you’ve found the GiveWP plugin.
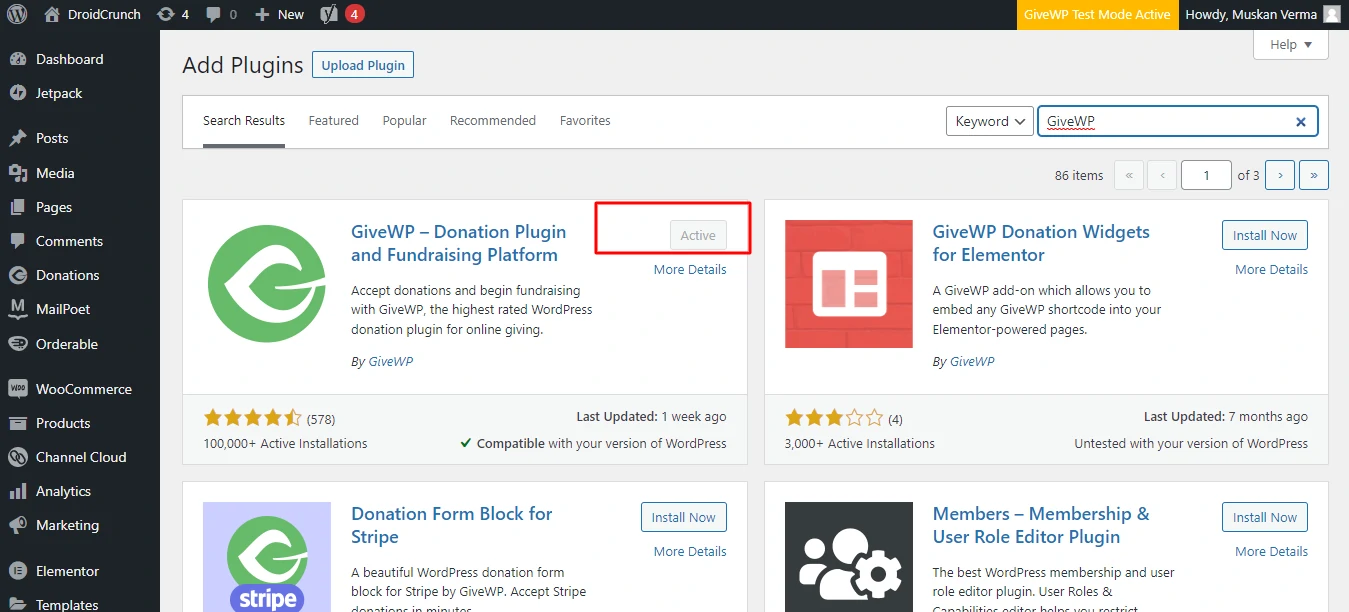
Your plugin has now been installed successfully. In addition, an ‘Activate‘ button is shown. Just click on it.
After that, you’ll get a Welcome page with the ‘Start Setup‘ option.
You’ll only need to submit some basic information to set up this plugin—for example, reason, location, characteristics, and so on. Nonetheless, you may configure it later by selecting Set Up from the navigation menu. And there you have it!
You have now successfully installed the core version of the GiveWP plugin.
Step 2: Make the License Key Active
Now you must return to your WordPress dashboard. And then go to Donations then Settings then Licenses.
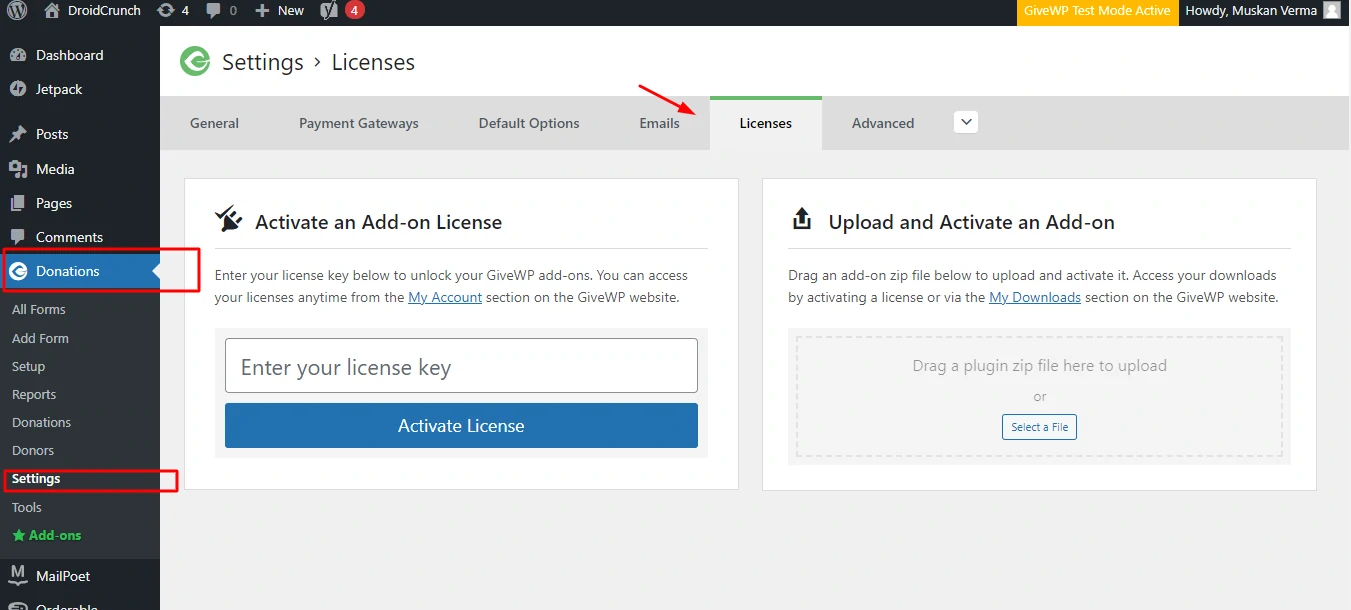
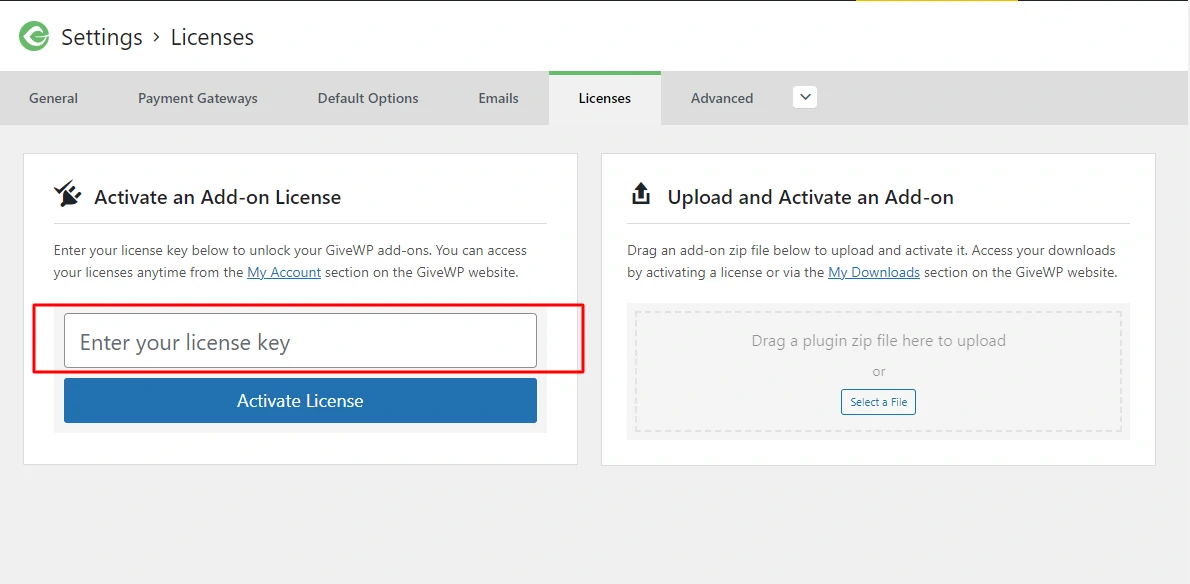
There will be a License Key box where you must input the license key you already obtained on your account. After that, select the ‘Activate License‘ option.
Step 3: Install and Enable the Required Addons
When you’ve successfully enabled it, you’ll see the success message in the image below on your dashboard.
You may download the addons individually from your GiveWP account and then install and activate them on your dashboard. However, this will be a time-consuming operation. So we’ll show you a simple way out! That is, if you scroll down on the same page, you will see all of the available add-ons that you acquired when you purchased the premium package.
All you have to do now is upload the add-zip-on file that you just downloaded. You will then see the Add-on successfully uploaded notification. You’ll also notice the ‘Activate Add-on‘ option. Just click on it to activate it.
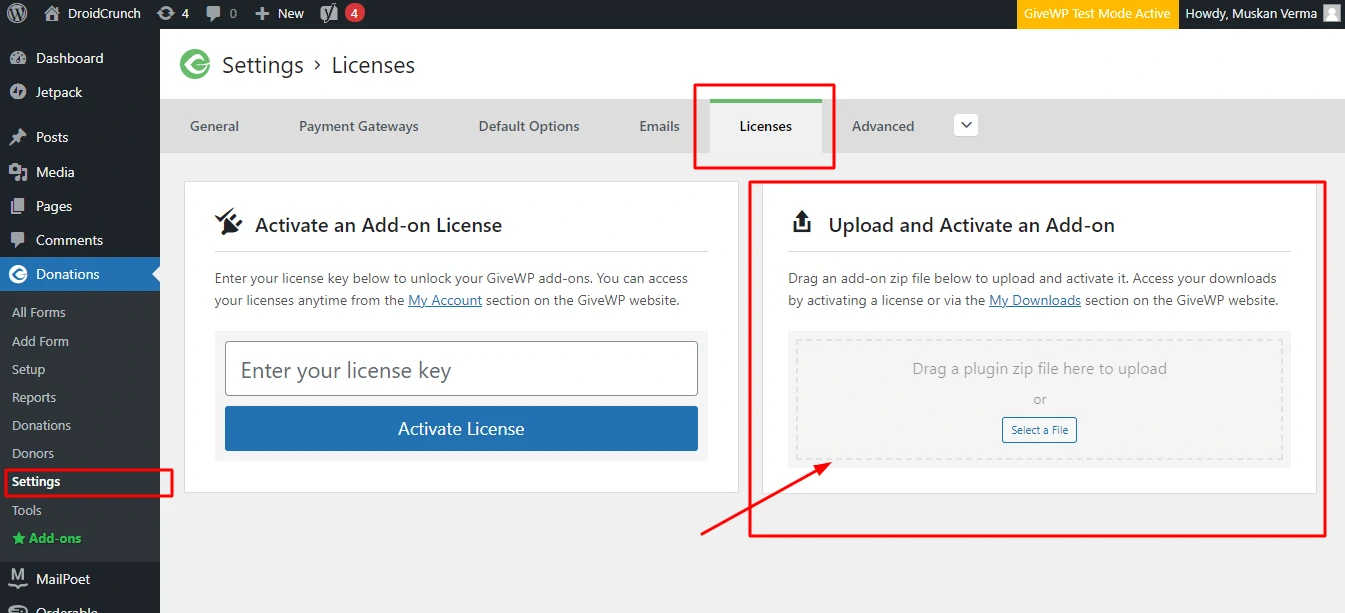
Similarly, you may download, upload, and activate the remaining essential add-ons separately.
How to set up your GiveWP Plugin?
The GiveWP donation plugin may be used to create a contribution form. So simply follow along as we teach you the way step by step.
#1: Create your donation form
The donation form needs to be made first things foremost. As was already said, the GiveWP plugin offers you donation form templates so you can get started right away.
To accomplish this, select the Donations then Add Form option from the dashboard’s left menu.
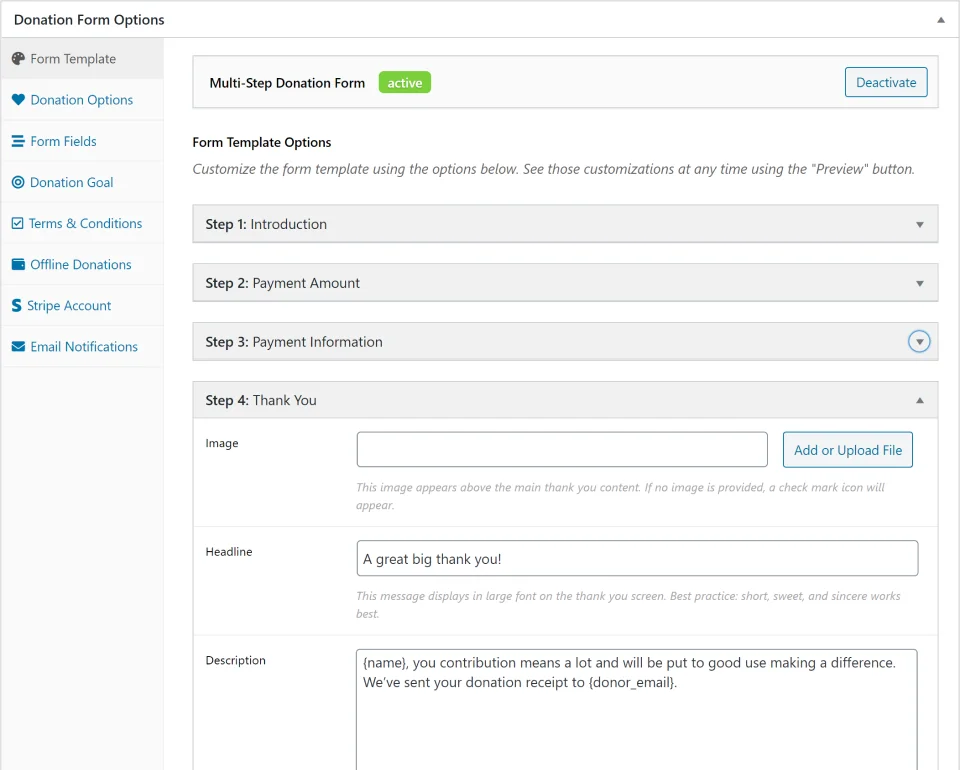
You will then view the page as it is depicted below. You must first give your form a decent title in the form title box. For now, refer to it as “Donation for a Cause.”
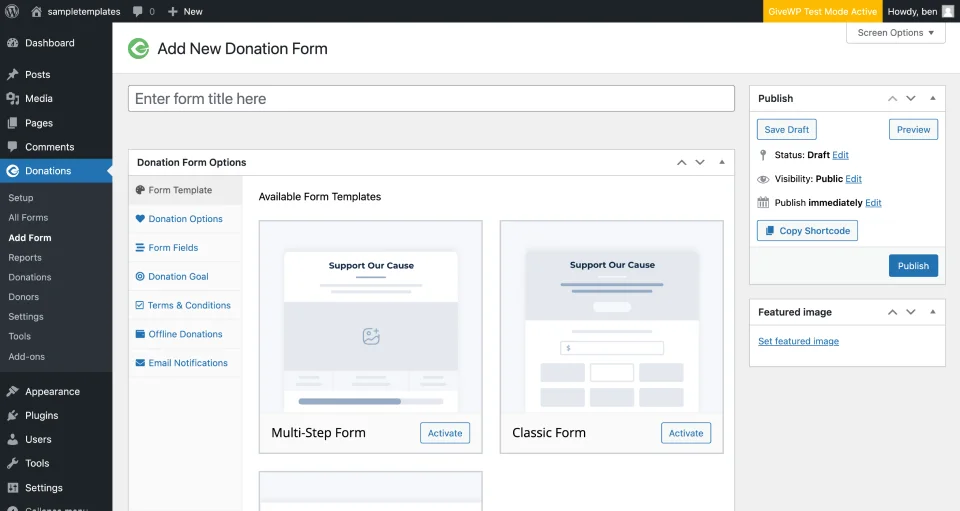
You can now see the various form templates if you scroll a little bit lower. The Multi-Step Form, Classic Form, and Legacy Form are all visible there. Here, the Multi-Step Form was selected.
To activate the Multi-Step Form, you click on the ‘Activate’ button on the side.
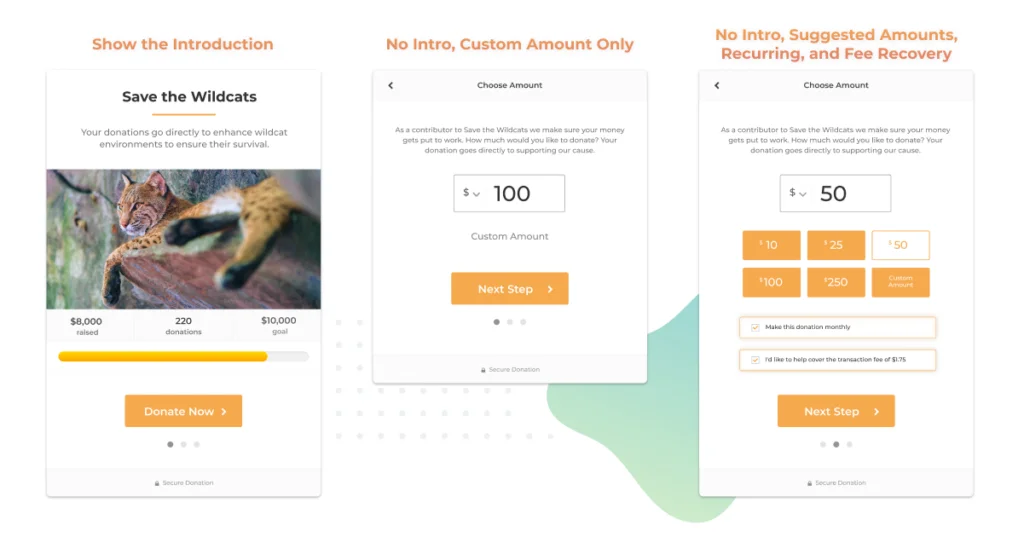
After activating it, you may customize the form using all the options offered. The color, font, number of form fields, contribution objectives, and a lot more are all editable.
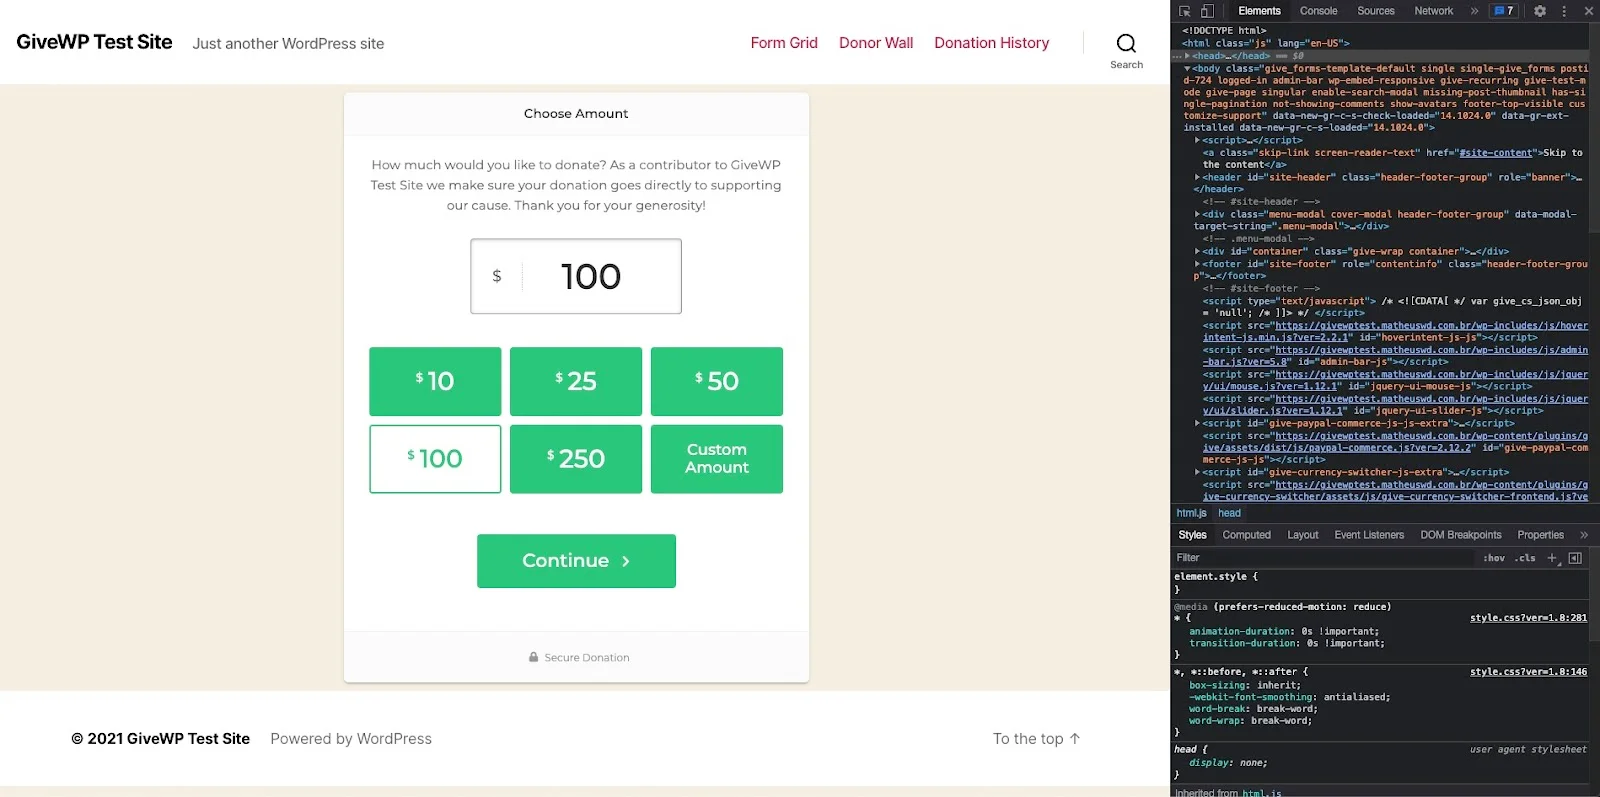
This will allow you to customize your contribution form precisely the way you want it. After that, simply select “Save Draft” from the menu in the upper right corner.
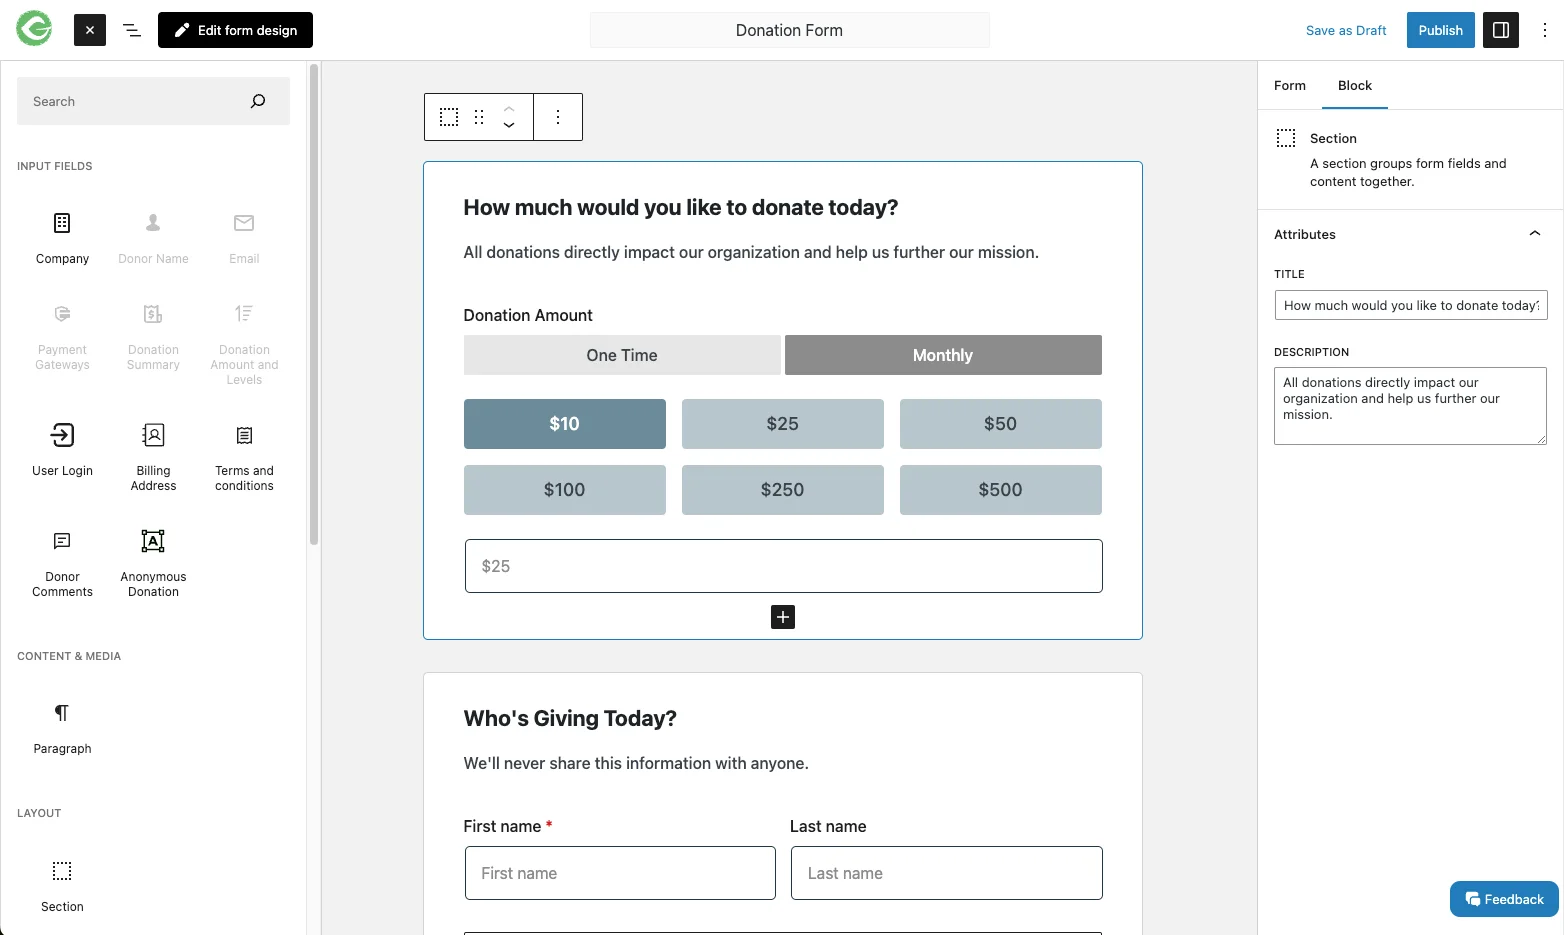
Let’s go on to the next stage, which is connecting to an appropriate payment gateway, with that.
#2: Access a Reliable Payment Gateway
Therefore, after creating a contribution form, the next step is to link it to an appropriate payment gateway. To accomplish this, follow the directions in the image below and go to Settings, then Payment Gateways.
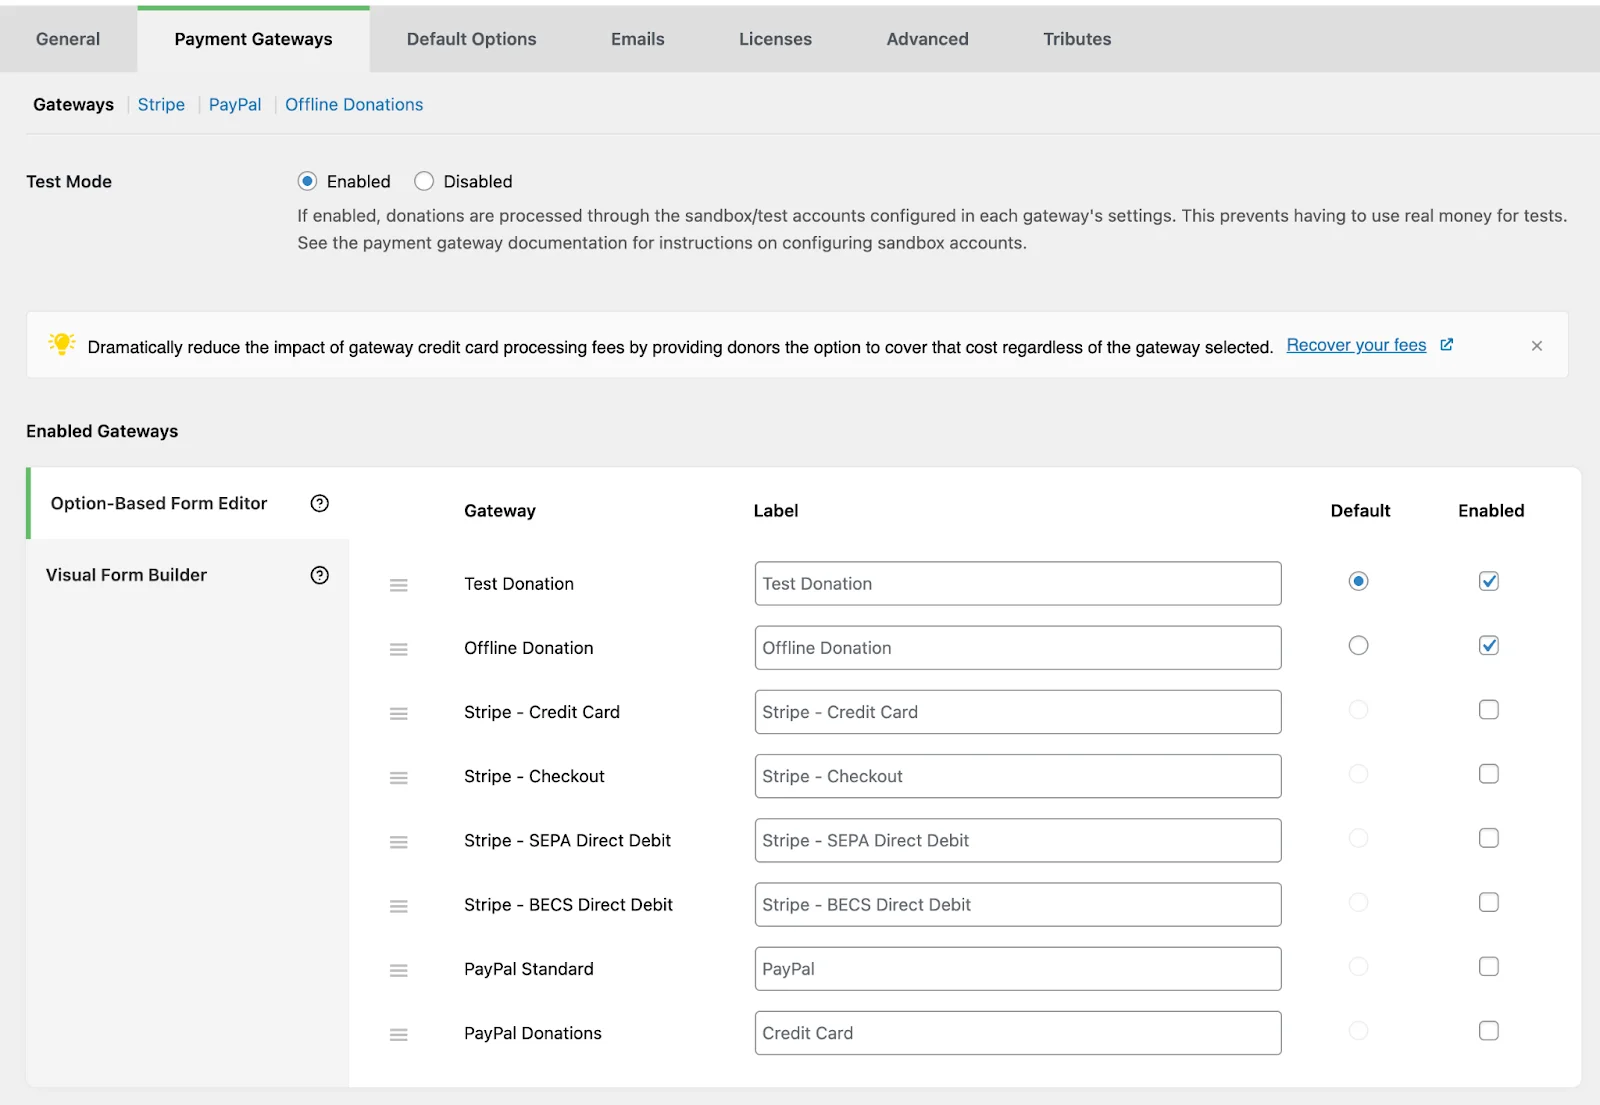
You will then see the choices for payment gateways that are offered. They are Offline Donations, PayPal, and Stripe.
You may quickly link your account by clicking on the appropriate payment gateway area. For instance, to link the Stripe account to the form in this instance, we clicked on the “Stripe” Tab.
GiveWP Stripe
To save your changes after embedding your account, just select the “Save Changes” button at the bottom.
Every gift made in this manner is received straight into the relevant Stripe account.
By selecting the appropriate gateway settings, you may also connect your Offline Donations and PayPal accounts.
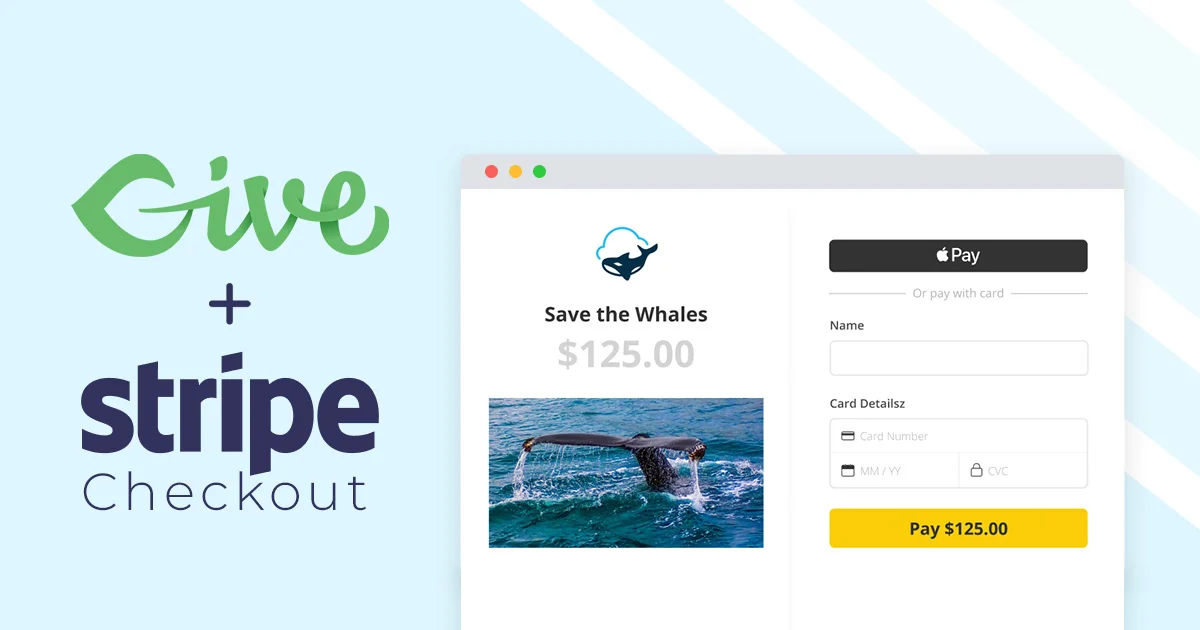
Additionally, connecting your account and providing other relevant information. But after making the adjustments, don’t forget to click “Save Changes.”
Additionally, you can quickly upload the required add-ons as previously explained if you desire extra payment gateways. Likewise, link your accounts and information.
After that, let’s go to the third and last stage of creating a contribution form.
#3: Add a donation form to the page
The Donation Form you developed in Step 1 is now immediately publishable from the All Forms area.
Alternatively, you might make a separate page, add your contribution form to it, and then publish it.
That looks pretty official as well, doesn’t it?
To perform this, choose Pages and then Add New. You are then sent to the Page Editor as a result.
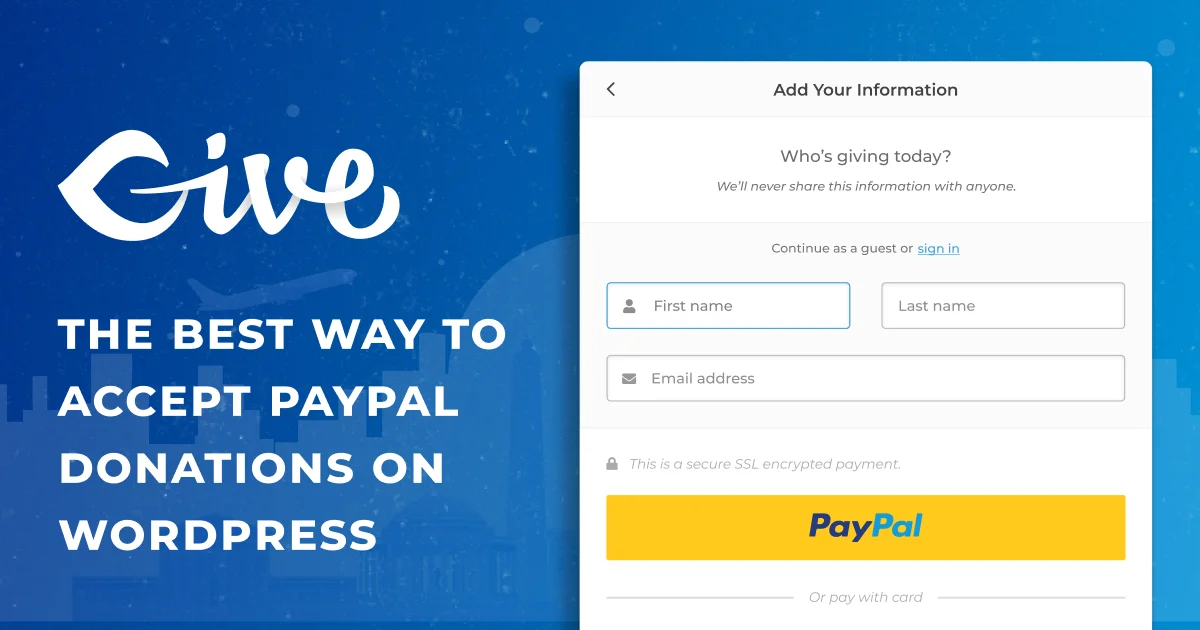
Give the Page a name that suits it now. Let’s write “DroidCrunch” as an example. The plus (+) icon can be seen after that. Click it, then in the search field, enter “donation form.”
With that, simply click on the “Donation Form” option when you see it.
The Donation Form box will then appear, as illustrated below. You can also view the previously produced “Form” on the drag-down option. Just click on it.
Click the “Publish” button in the upper right corner when finished.
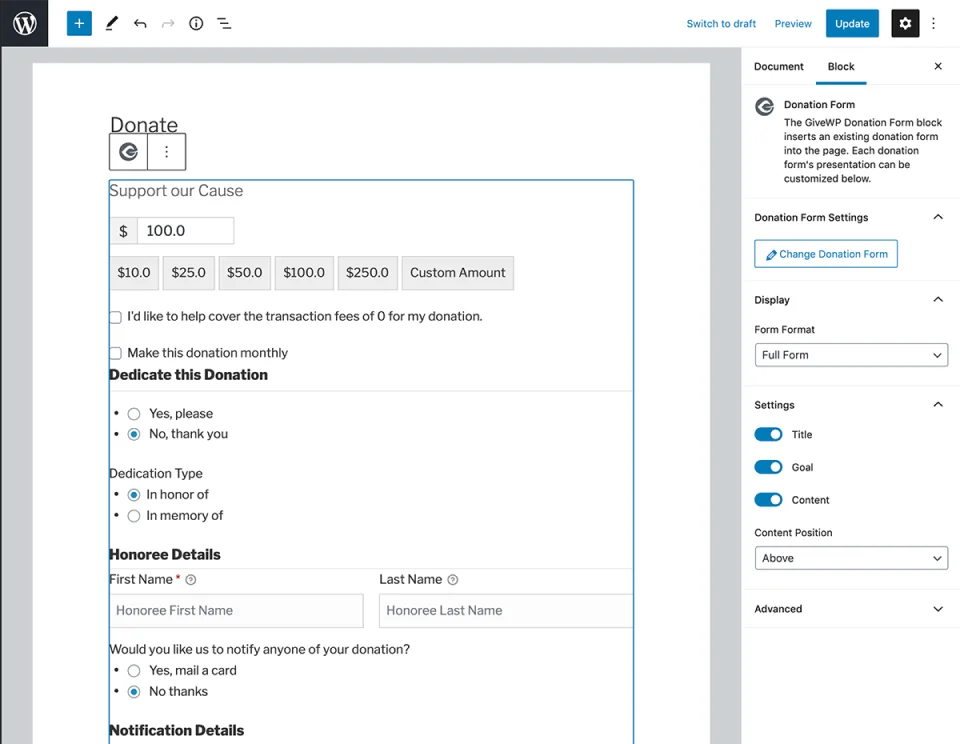
Finally, you may check a live preview of the donation form on the donation page by visiting your live website.
FAQs
Why is GiveWP the best WordPress donation plugin?
Don’t take our word for it. GiveWP has the most five-star reviews and the highest active installations of any donation plugin for WordPress. We’re proud to provide quality products for both our free and paid users.
What email marketing applications interact with GiveWP?
All significant email marketing platforms, including MailChimp, Constant Contact, ConvertKit, AWeber, and others, are integrated with GiveWP. This makes it simple for you to notify your contributors of the status of their gifts via automated emails.
How is this different from a PayPal donate button?
While GiveWP works with PayPal, this solution can keep donors on your website while they give. Plus, you get a complete donation form and fundraising tools that PayPal doesn’t provide.
Is GiveWP Translatable?
Yes! Translation for Give is handled in two different ways: one is for the main plugin, and the other for premium add-ons. The best thing to do to work on translating Give is to start with our documentation.
Does GiveWP integrate with Salesforce?
The GiveWP Salesforce add-on allows for integration with Salesforce. Thus, the answer is yes. This add-on lets you link your GiveWP contribution platform to your Salesforce CRM, which is made explicitly for Salesforce NonProfit Success Pack (NPSP) accounts.
How do I connect Salesforce to GiveWP?
No more Zapier connection is necessary! Simply use the Salesforce connection button in your GiveWP settings, found in the WordPress admin dashboard, to connect to your Salesforce Nonprofit Success Pack account.
Conclusion
GiveWP stands out as a robust and user-friendly contribution management solution for organizations of all sizes. Its comprehensive features, such as configurable forms, recurring donations, and donor management tools, allow you to streamline your fundraising efforts.
The seamless WooCommerce integration and built-in marketing tools add to its appeal. While some competitors may provide more advanced capabilities or lower prices, GiveWP delivers a balanced and valuable alternative for most non-profits looking for a robust and user-friendly platform to manage donations and create great relationships with supporters.
The Review
GiveWP
GiveWP is a trusted plugin for WordPress that one can use when creating a donation based website. It is easy to use and setup. One can create website and start receiving donations on the go.
PROS
- Easy to Use Plugin
- Various Customization Options
- Easy to Receive Donations
- Best for NGOs
- Reliable Code and Adaptability on Various themes
- One can start using it for FREE
CONS
- All Payment Gateways not availabe in Free plan
Review Breakdown
-
Easy to Use
-
Features
-
Value for Money
-
Scalability
-
Well Documented
-
Support

