Canva is the best tool for improving your visual storytelling, regardless of your level of design experience.
Hi there, digital makers and design enthusiasts! 🎨✨ As we explore the enchanted world of Canva today, get ready to turbocharge your creative adventure.
The best Canva tips and tricks for 2026 will be covered in detail in this article. We cover everything, from how to get started to the sophisticated capabilities that Canva Pro has to offer.
So grab a seat, and join us as we explore the endless creative options that Canva brings to you.
Unlock Your Creativity with Canva, Here are the tips and tricks of Canva
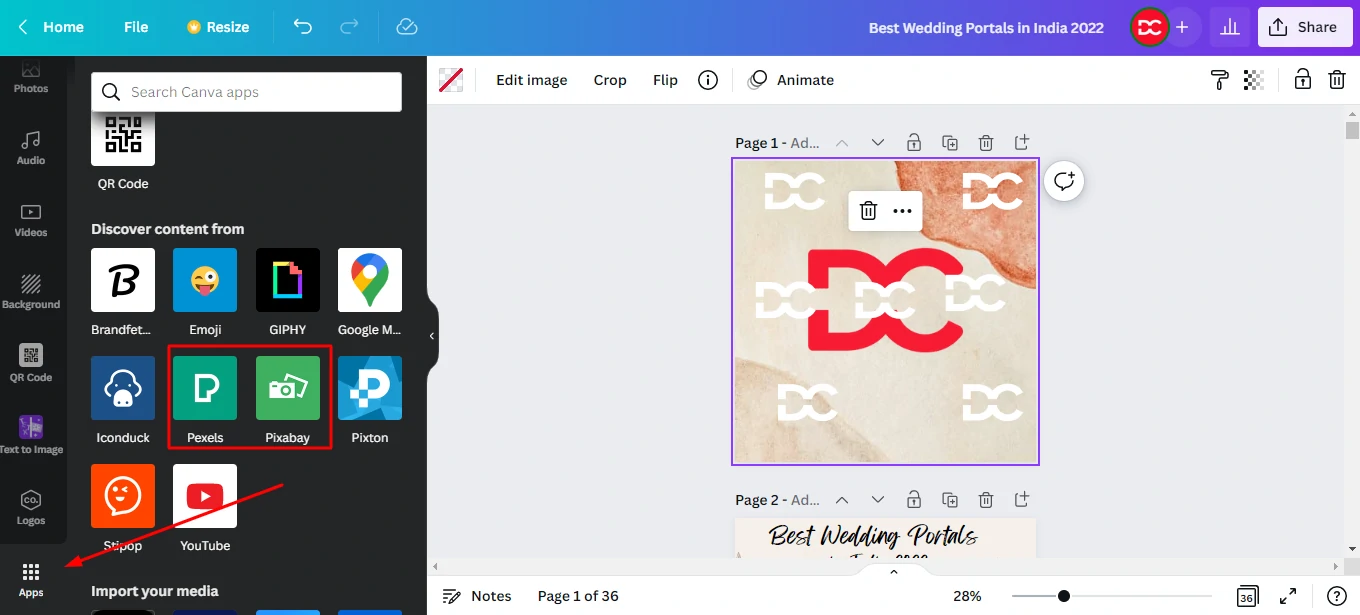
Canva Pexels & Pixabay Inside
This is a tip for Canva Free Plan customers. If you’ve used online design tools before, you’ll know that Canvas’s free stock photo library isn’t as remarkable as Pixelied or Crello’s.
Canva incorporates the Pexels and Pixabay libraries within its editor, giving you access to a larger photo library and a wider range of stock photos!
Step 1: Navigate to the Canva Editor and choose ‘apps’ from the left sidebar.
Step 2: Select Pexels or Pixabay from the Integrations menu and search for your favorite photos.
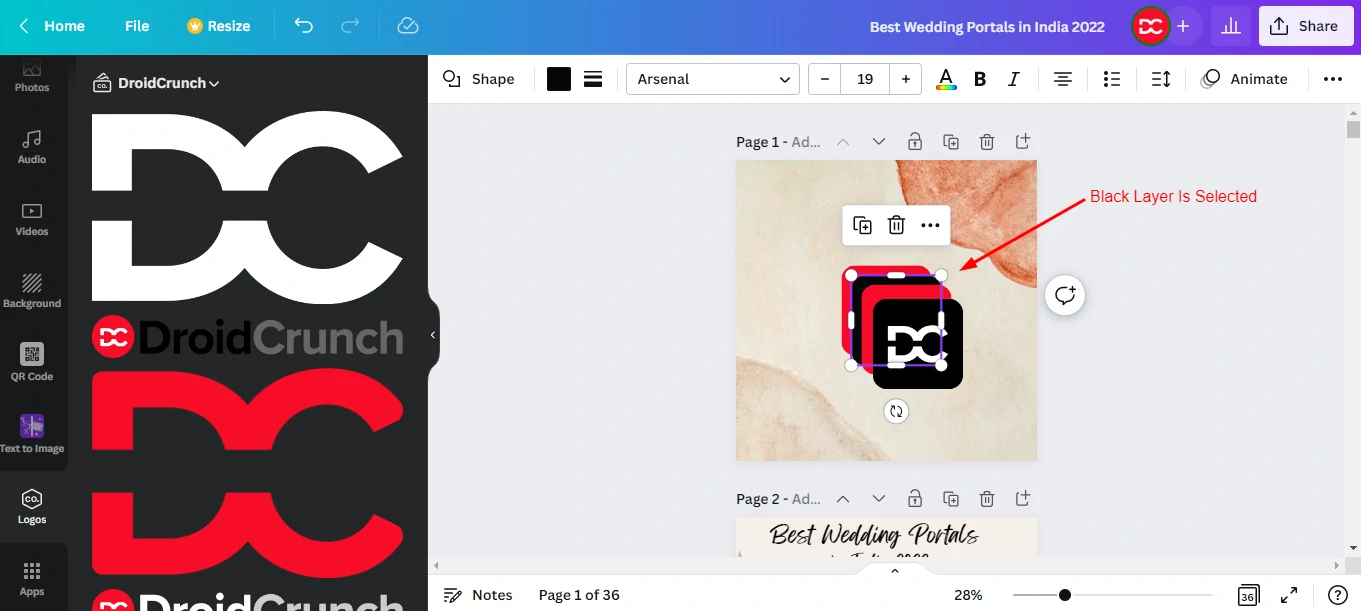
Select Layer Behind
Don’t you wish to avoid it when you have numerous levels in your design and changing one element disturbs all the others? I feel your anguish!
So, here’s a quick keyboard shortcut for selecting one layer at a time. This approach is also quite useful for locating hidden parts in my designs.
Step 1: Select the first layer on the page by pressing Ctrl+click or Cmd+click.
Step 2: Continue clicking until you reach the layer you want to change. You may now modify the selected layer without fear of upsetting the others.
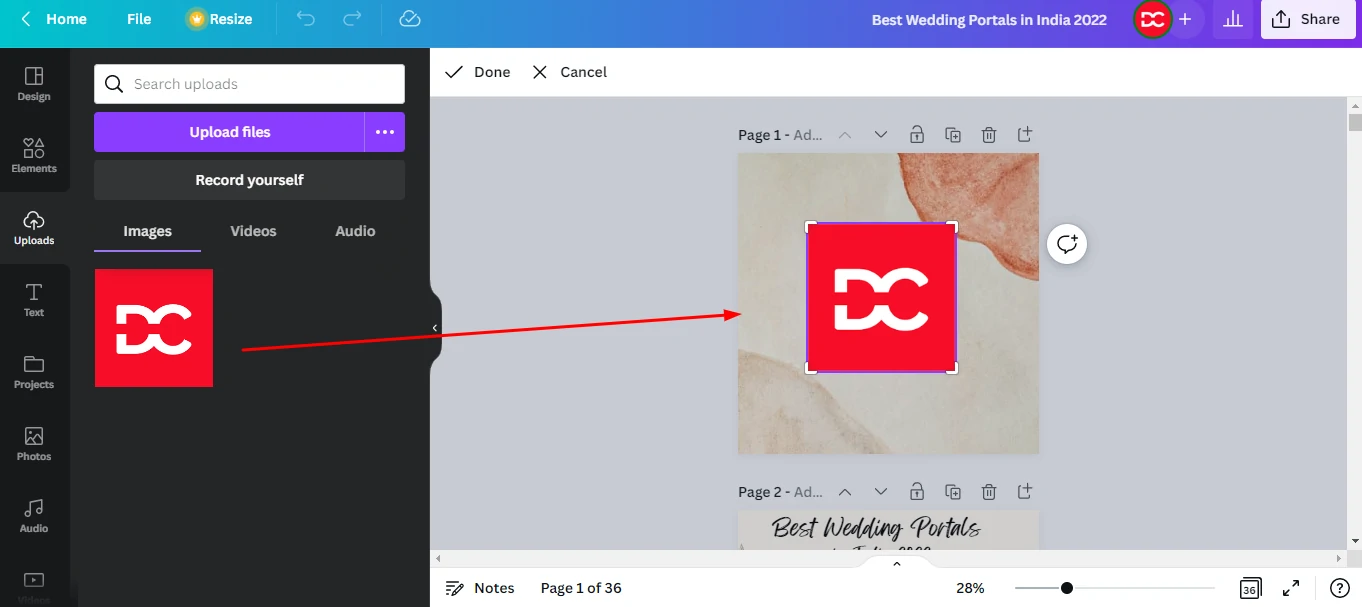
Canva Frames for Mockups and Collages
Canva Frames is a fantastic feature that allows you to construct gorgeous frames around your projects, as well as make photo collages, grids, cuts of various forms, and even picture mockups!
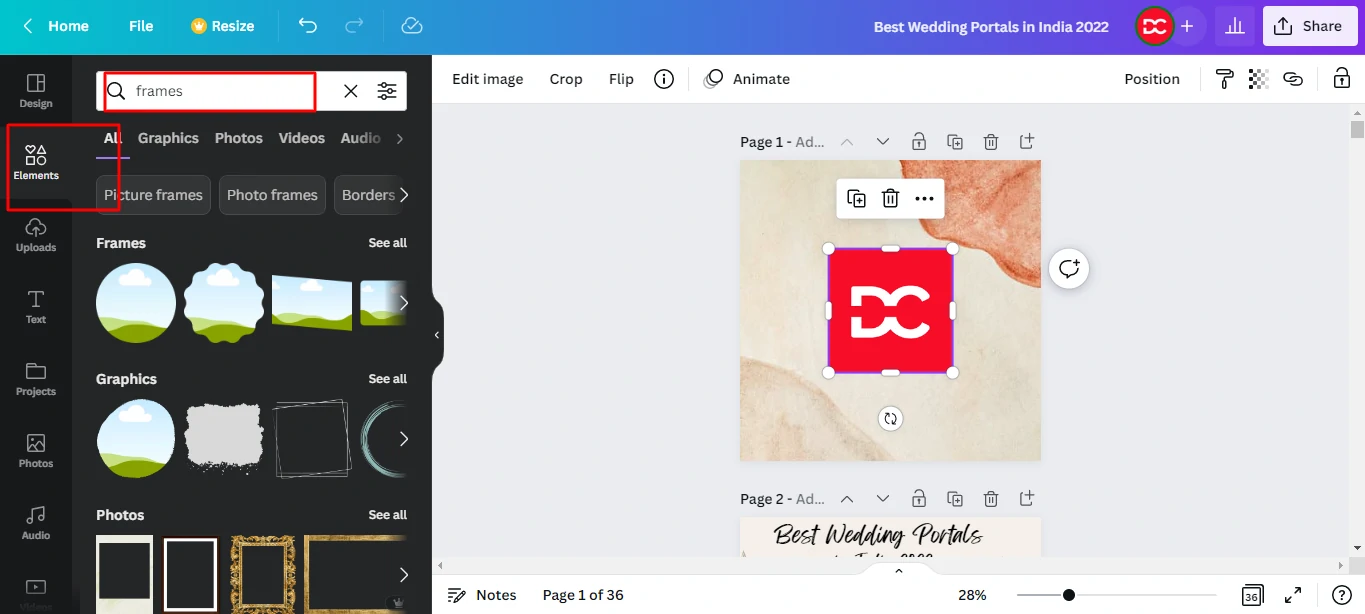
Step 1: In the Elements tab’s search field, type Frames.
Step 2: Choose a suitable frame, grid, or mockup.
Step 3: Drag and drop any picture into it, then double-click to resize it.
Mockups are really beneficial for developing commercials or promotional marketing materials! If you especially want a tool for creating mockups.
Canva Shortcuts
Canva enhances your creative experience by providing a plethora of useful keyboard shortcuts. Aside from that, Canva has a plethora of other shortcuts that can be discovered on the Canva website. They’ve made a lovely shortcut infographic.
Basic shortcuts
| Action | Mac Shortcut | Windows Shortcut |
|---|---|---|
| Undo | Command + Z | Ctrl + Z |
| Redo | Command + Y | Ctrl + Y |
| Save | Command + S | Ctrl + S |
| Select all | Command + A | Ctrl + A |
| Add text | T | T |
| Add rectangle | R | R |
| Add line | L | L |
| Add circle | C | C |
| Add link | Command + K | Ctrl + K |
| Add emoji (Canva Docs and comments only) | Shift + ; | Shift + ; |
| Add empty page | Command + Return | Ctrl + Enter |
| Delete empty page | Command + Delete | Ctrl + BACKSPACE |
| Navigate to toolbar | Command + F1 | Ctrl + F1 |
| Skip to canvas | Command + F2 | Ctrl + F2 |
| Canva Assistant shortcut | / or Command + E | / or Ctrl + E |
Element shortcuts
| Action | Mac Shortcut | Windows Shortcut |
|---|---|---|
| Delete selected elements | Delete | Backspace or Delete |
| Group elements | Command + G | Ctrl + G |
| Ungroup elements | Command + Shift + G | Ctrl + Shift + G |
| Lock element | Option + Shift + L | Alt + Shift + L |
| Arrange elements forward | Command + ] | Ctrl + ] |
| Arrange elements backward | Command + [ | Ctrl + [ |
| Arrange elements to front | Option + Command + ] | Alt + Ctrl + ] |
| Arrange elements to back | Option + Command + [ | Alt + Ctrl + [ |
| Tidy up elements | Option + Shift + T | Alt + Shift + T |
| Select next/previous elements | Tab or Shift + Tab | Tab or Shift + Tab |
Video shortcuts
| Action | Mac Shortcut | Windows Shortcut |
|---|---|---|
| Play/pause video | Space | Space |
| Mute/unmute video | M | M |
| Loop video | Option + Command + L | Alt + Ctrl + L |
Zooming shortcuts
| Action | Mac Shortcut | Windows Shortcut |
|---|---|---|
| Zoom in | Command + (+) | Ctrl + (+) |
| Zoom out | Command – (-) | Ctrl + (-) |
| Zoom to actual size | Command + 0 | Ctrl + 0 |
| Zoom to fit | Option + Command + 0 | Alt + Ctrl + 0 |
| Zoom to fill | Shift + Command + 0 | Shift + Ctrl + 0 |
Edit text shortcuts
| Action | Mac Shortcut | Windows Shortcut |
|---|---|---|
| Open font menu | Shift + Command + F | Shift + Ctrl + F |
| Find and replace | Command + F | Ctrl + F |
| Bold text | Command + B | Ctrl + B |
| Italicize text | Command + I | Ctrl + I |
| Underline | Command + U | Ctrl + U |
| Uppercase | Shift + Command + K | Shift + Ctrl + K |
| Left align | Shift + Command + L | Shift + Ctrl + L |
| Centre align | Shift + Command + C | Shift + Ctrl + C |
| Right align | Shift + Command + R | Shift + Ctrl + R |
| Justify text | Shift + Command + J | Shift + Ctrl + J |
| Decrease font size by one | Shift + Command + , | Shift + Ctrl + , |
| Increase font size by one | Shift + Command + . | Shift + Command + . |
| Decrease line spacing | Option + Command + Down | Alt + Ctrl + Down |
| Increase line spacing | Option + Command + Up | Alt + Ctrl + Up |
| Decrease letter spacing | Option + Command + , | Alt + Ctrl + , |
| Increase letter spacing | Option + Command + . | Alt + Ctrl + . |
| Anchor text to top | Command + Shift + H | Ctrl + Shift + H |
| Anchor text to middle | Command + Shift + M | Ctrl + Shift + M |
| Anchor text to bottom | Command + Shift + B | Ctrl + Shift + B |
| Numbered list | Command + Shift + 7 | Ctrl + Shift + 7 |
| Bulleted list | Command + Shift + 8 | Ctrl + Shift + 8 |
| Copy text style | Option + Command + C | Alt + Ctrl + C |
| Paste text style | Option + Command + V | Alt + Ctrl + V |
View shortcuts
| Action | Mac Shortcut | Windows Shortcut |
|---|---|---|
| Toggle rulers and guides | Shift + R | Shift + R |
| Toggle sidebar | Command + / | Ctrl + / |
| Scrolling view | Option + Command + 1 | Alt + Ctrl + 1 |
| Thumbnail view | Option + Command + 2 | Alt + Ctrl + 2 |
| Grid view | Option + Command + 3 | Alt + Ctrl + 3 |
| Presentation mode | Option + Command + P | Alt + Ctrl + P |
Comment shortcuts
| Action | Mac Shortcut | Windows Shortcut |
|---|---|---|
| Add comment | Option + Command + N | Alt + Ctrl + N |
| Add emoji | Shift + ; | Shift + ; |
| Next comment | N | N |
| Previous comment | Shift + N | Shift + N |
| Focus on comment in selection | Command + 5 | Ctrl + 5 |
Desktop app shortcuts
| Action | Mac Shortcut | Windows Shortcut |
|---|---|---|
| Quit the whole Canva app | Command + Q | Alt + F4 |
| Reload the whole app | Command + R | Ctrl + R |
| Enter full-screen mode | ^ + Command + F (Control + Command + F) | Not Applicable |
| Close the current tab | Command + W | Ctrl + W |
| Select next tab | Option + Command + Right | Ctrl + PageDown or Ctrl + Tab |
| Select the previous tab | Option + Command + Left | Ctrl + PageUp or Ctrl + Shift + Tab |
| Re-open last closed tab | Command + Shift + T | Ctrl + Shift + T |
| Create new design | Command + T | Ctrl + T |
| Switch tabs to focus on a design tab from 1-8 | Command + 1…8 | Ctrl + 1…8 |
| Switch to the last tab | Command + 9 | Ctrl + 9 |
| Open the Settings page | Command + , | Not Applicable |
| Open the Home page | Command + Shift + H | Ctrl + Shift + H |
| Zoom in app interface | Command + Shift + (+) | Ctrl + Shift + (+) |
| Zoom out app interface | Command + Shift + (-) | Ctrl + Shift + (-) |
| Reset app interface scaling to default | Shift + Command + 0 | Not Applicable |
| Close window | Shift + Command + W | Alt + F4 |
Smart Mockups
Canva combines with SmartMockups to bring your work to life if you develop printed items, garments, technologies, clothing lines, novels, or anything else.
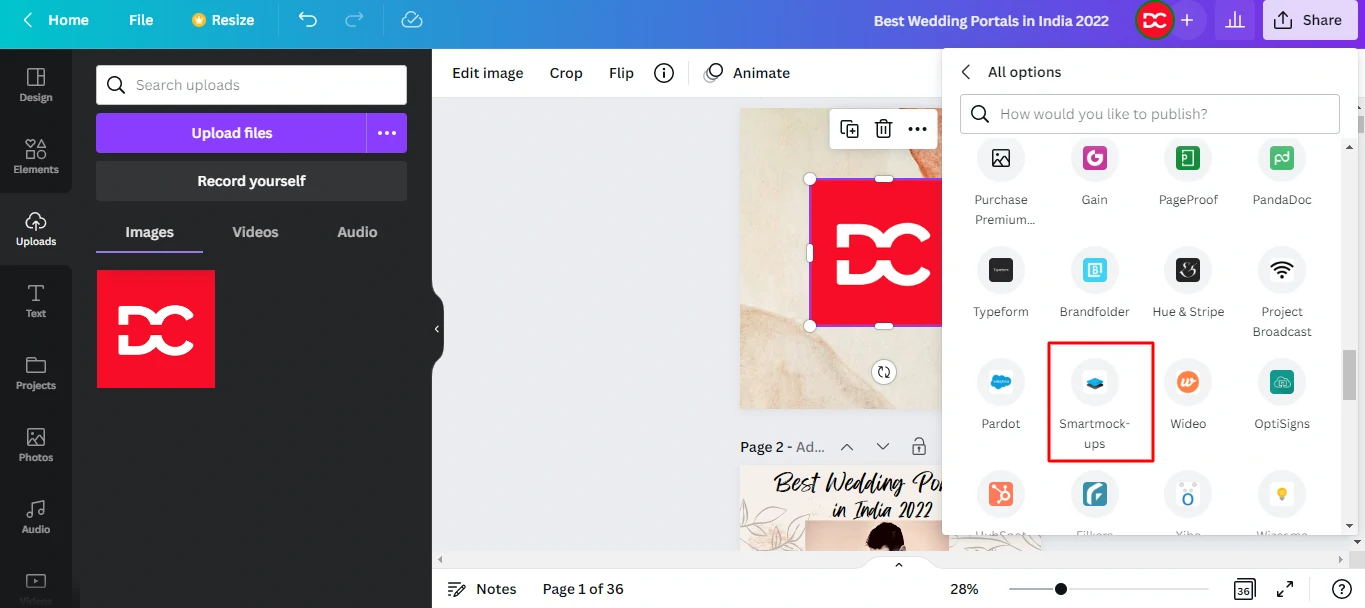
Step 1: Create your image by clicking on the three dots in the upper right corner.
Step 2: Go to the Share menu and choose Smart Mockups.
Step 3: Create an account on SmartMockups using your email address.
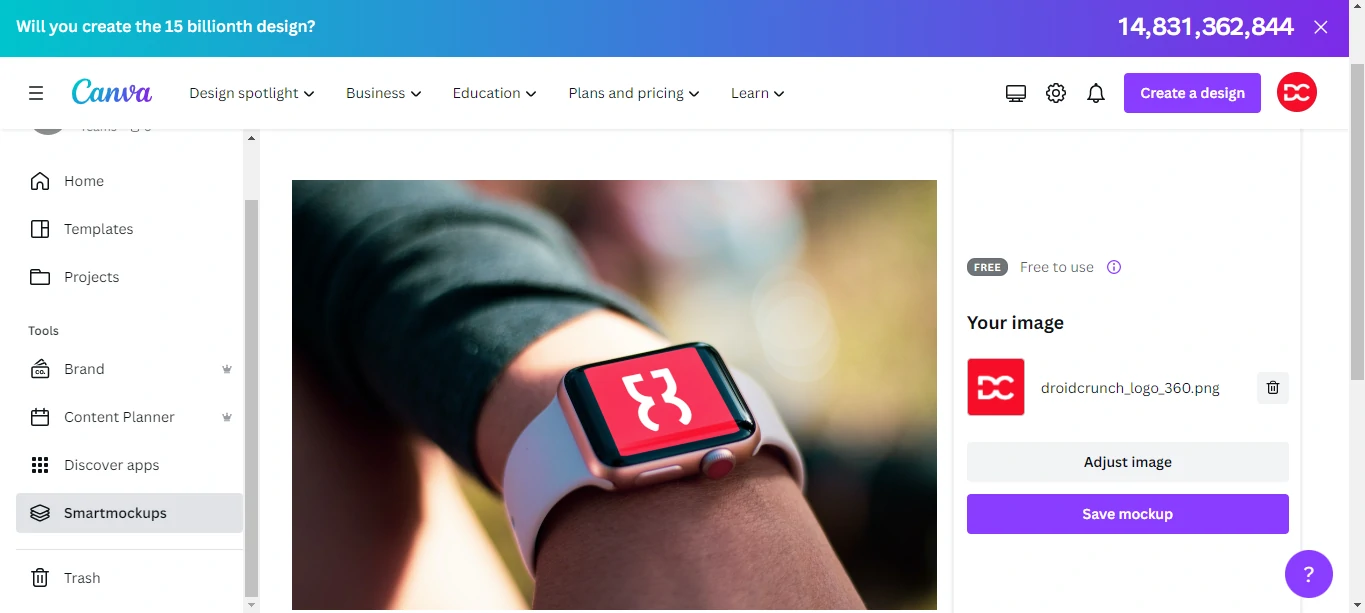
You may now see your books, T-shirts, websites, and other items printed on real-world objects! It’s a fantastic feature for testing your items before having the designs produced!
Lock Elements
When working with a large number of items, it might be difficult to choose them individually, especially when there are layers involved! A simple solution would be to lock the final drawings in place.
Step 1: Choose the pieces that have been finished and group them.
Step 2: Select the Lock symbol.
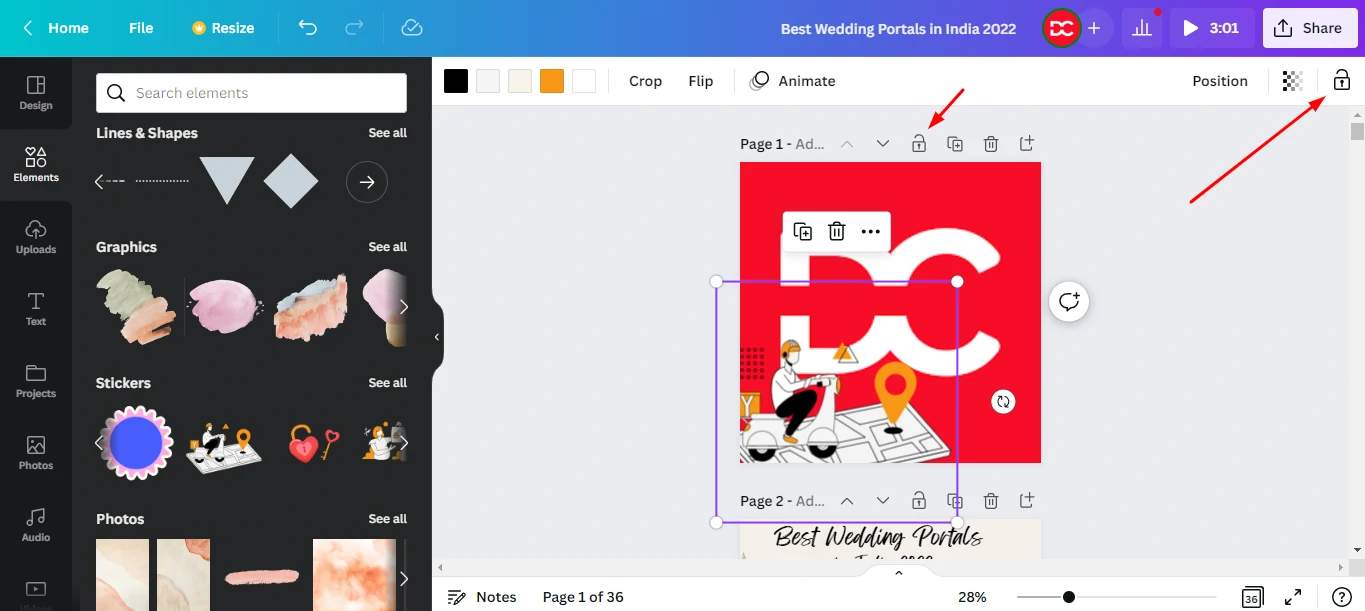
What you do with the other components on the page now does not affect the locked elements. They will remain in their current location until unlocked.
Filter Search Results
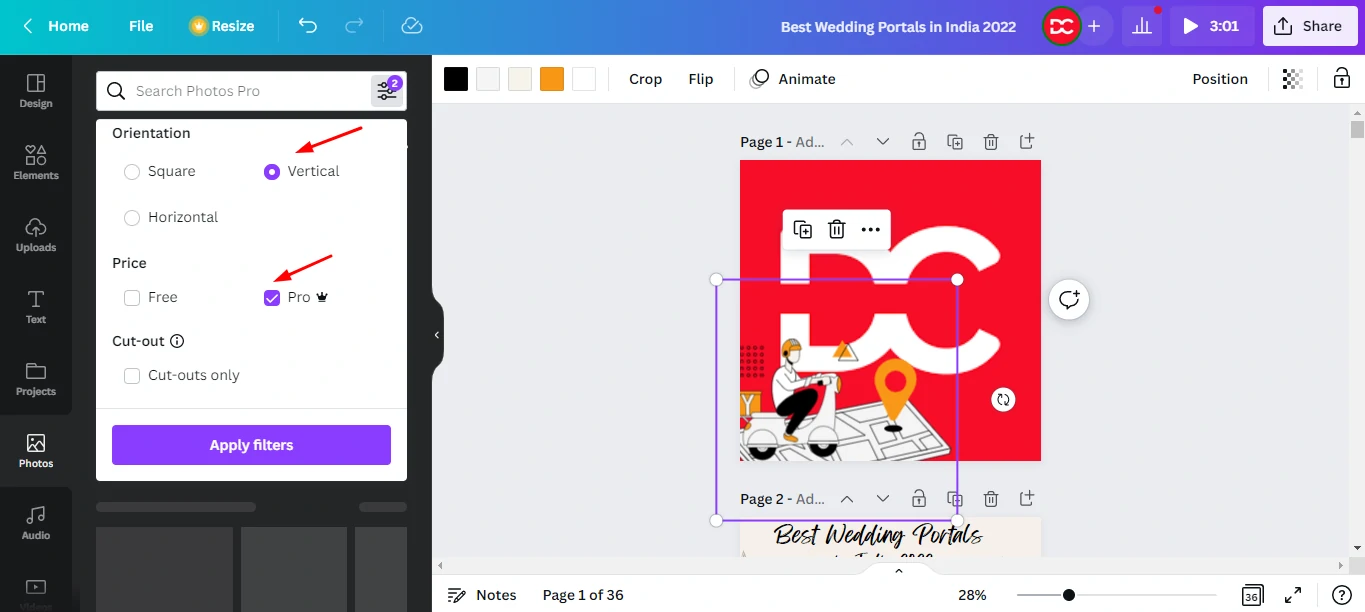
Despite having a Canva Pro subscription, we cannot always employ pro elements due to a lack of time. You will see a Filter icon beside the search field while looking for pictures, materials, movies, and so on.
You may use it to filter your results by ‘Pro’ to only see the paid photographs.
You may also refine your search by
- Color
- Animation Style
- Orientation (Square, Vertical, Horizontal, etc)
Add a QR Code
When developing business cards or marketing materials to advertise your app, website, or brand, Canvas URL Generator comes in handy.
Step 1: Select ‘More’ from the left sidebar.
Step 2: Go to Apps and Integrations and find the QR code Generator.
Step 3: Include the URL in your blog, website, corporation, or app.
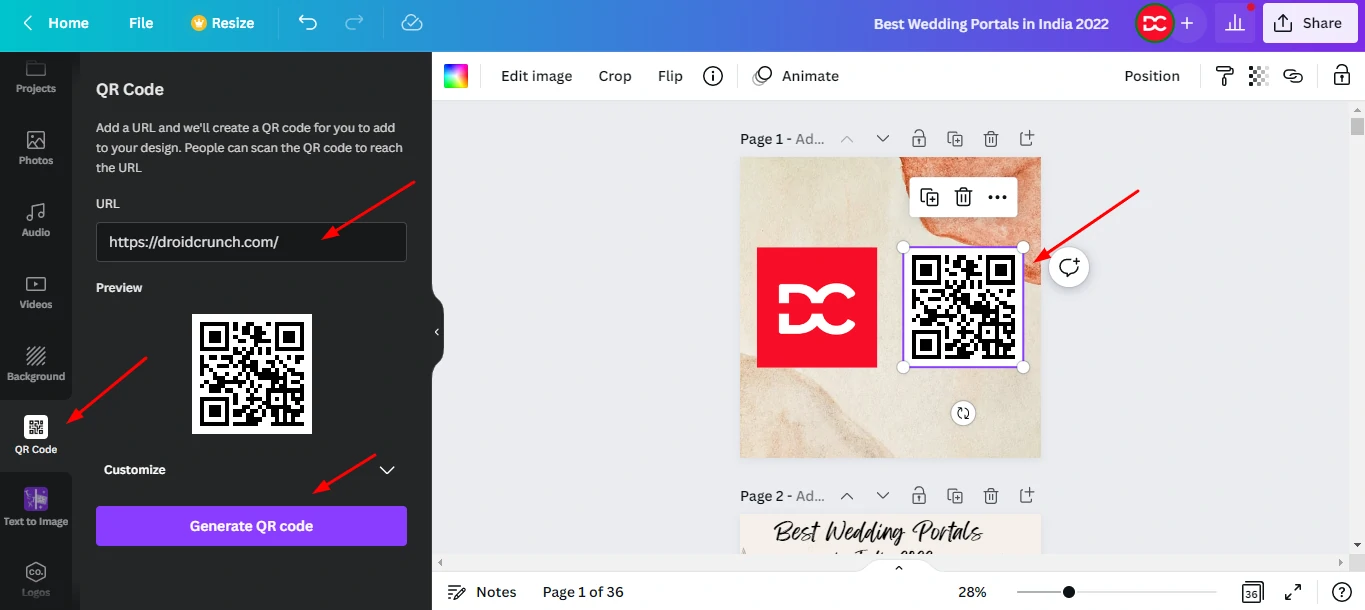
Your URL will be turned into a QR code, which visitors may scan with their smartphones.
Adjusting colors of Graphic Art

You can modify the colors of your vector components in Canva. When you choose a vector element, the header bar displays all of the colors that make up that element. Change the color by clicking on it and selecting a different one!
Tidy Up for Even Spacing
Do you have a lot of items on your page? Manually aligning them is out of date!
Try the Tidy-Up function instead!
Step 1: Select the components to be aligned and click Position.
Step 2: Select an alignment direction – (Right, left, or center) and (Bottom, middle, or top)
Step 3: Now, utilize the ‘Tidy Up’ function to produce an appealing design by applying equal space between your pieces!
Add Links
Canva makes it easier than ever to include hyperlinks in your ebooks and papers. Simply follow this easy procedure.
Step 1: Select the text to which you want to add a link.
Step 2: Click the hyperlink symbol in the upper right corner.
Step 3: Enter the address of an external website.
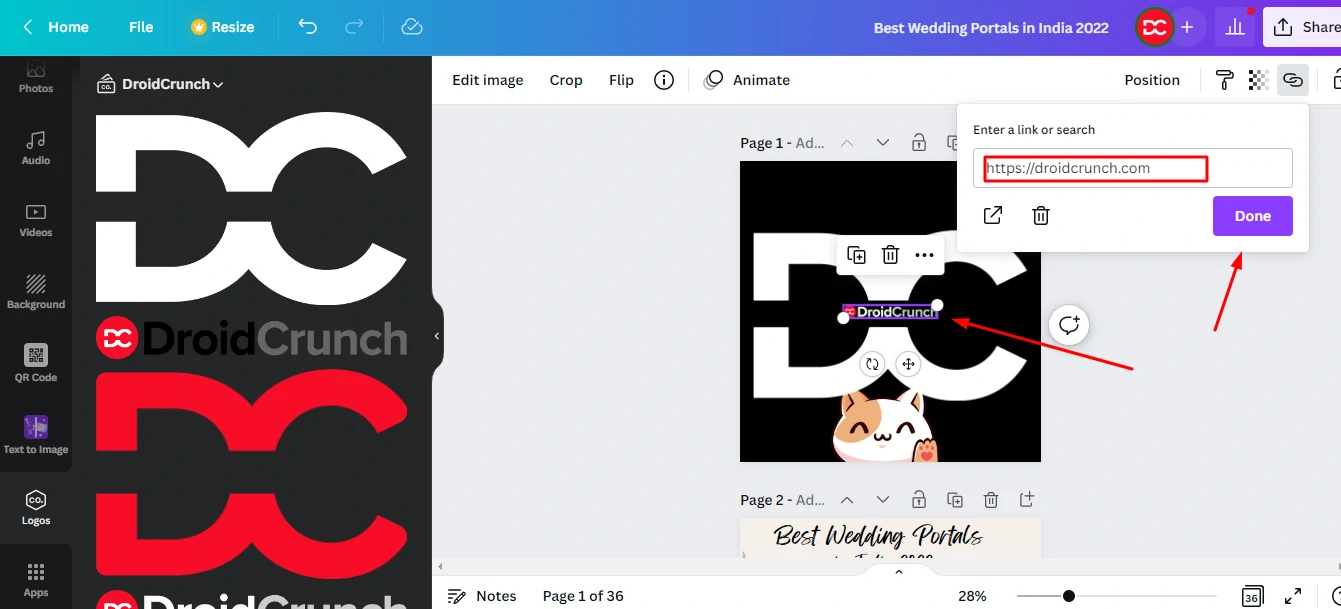
And it’s done! The link should now function if you export your design to PDF format. The only disadvantage is that hyperlinks only function with PDFs. They are incompatible with JPG, PNG, and other file formats.
Canva Animation
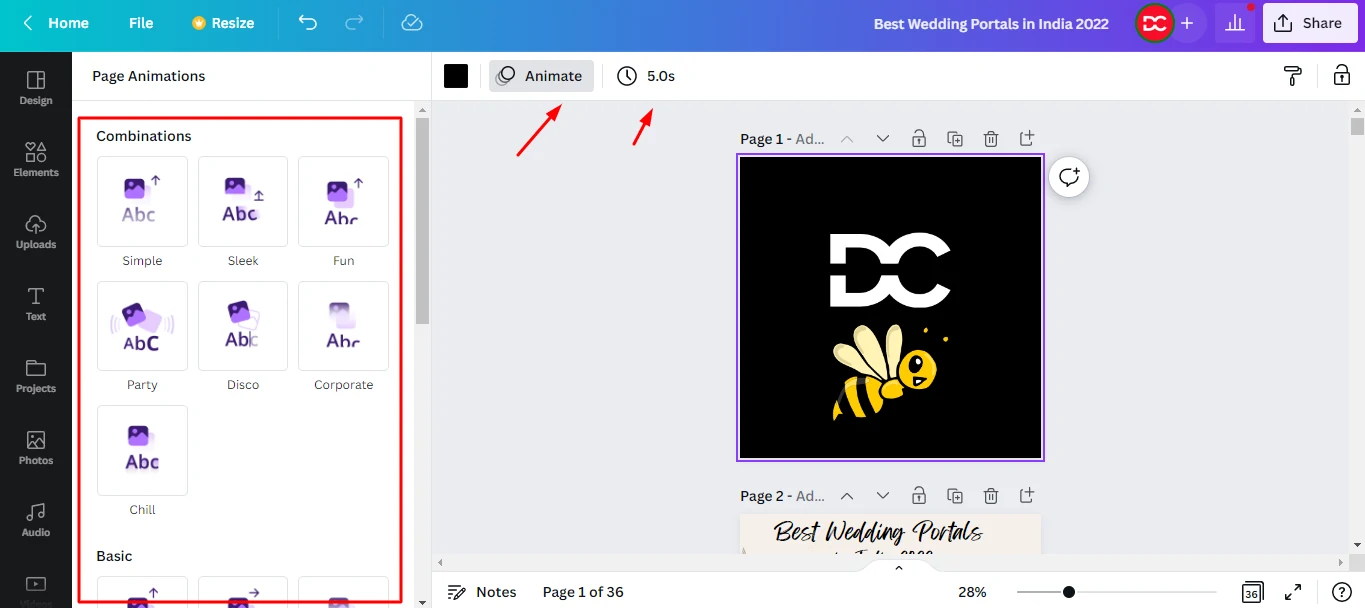
Canva also features 6 different animation effects in the free edition and 13 in the Pro plan to make your designs even more appealing! When you add any design element to a blank page, the animate button appears on the top left. Make moving components using it!
Search Templates on the Home Page
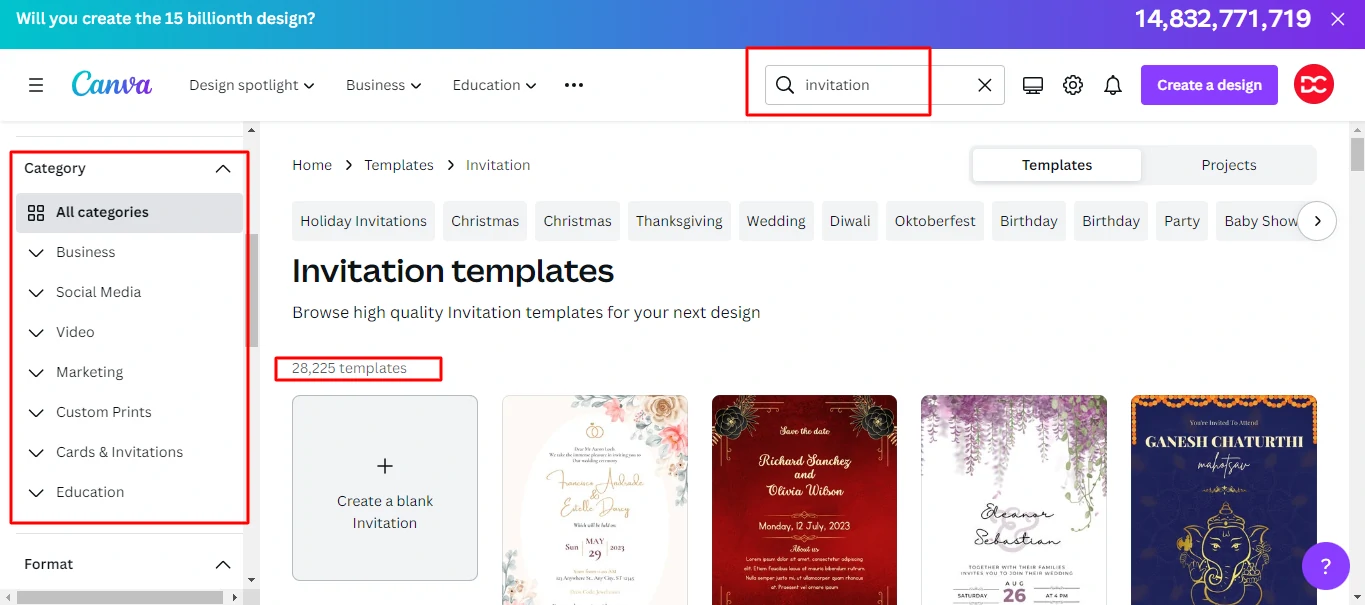
Most people choose the design format first, then the templates. However, the format of your design may restrict the search results.
The ideal invitation template you want may not be available in marketing template format! As a result, you should search for templates from the main page to have a large number of possibilities to choose from. You may afterward resize it to fit the format you wish to use it on.
Canva Live Stream
Canva may be used to start a live broadcast.
Step 1: Select the Present option from the ‘Recommended’ menu.
Step 2: Click the options for Presentation. then present
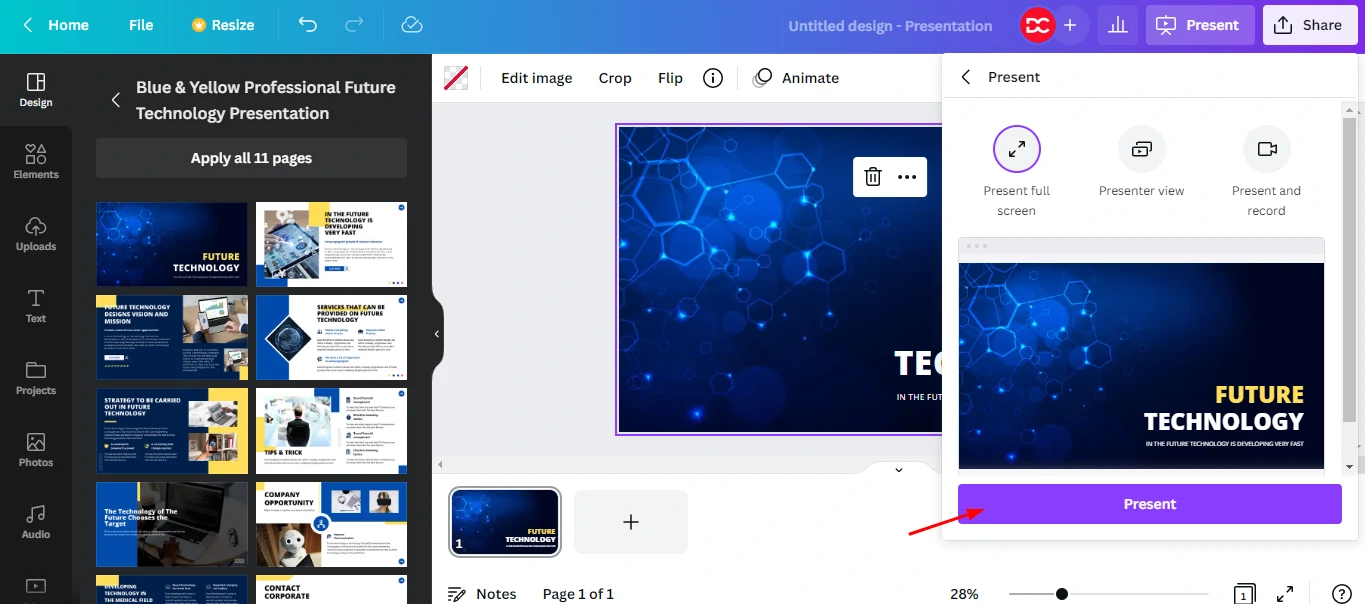
Step 3: Launch a new session and paste the invitation URL into it.
Step 4: Share this URL with others and begin live broadcasting!
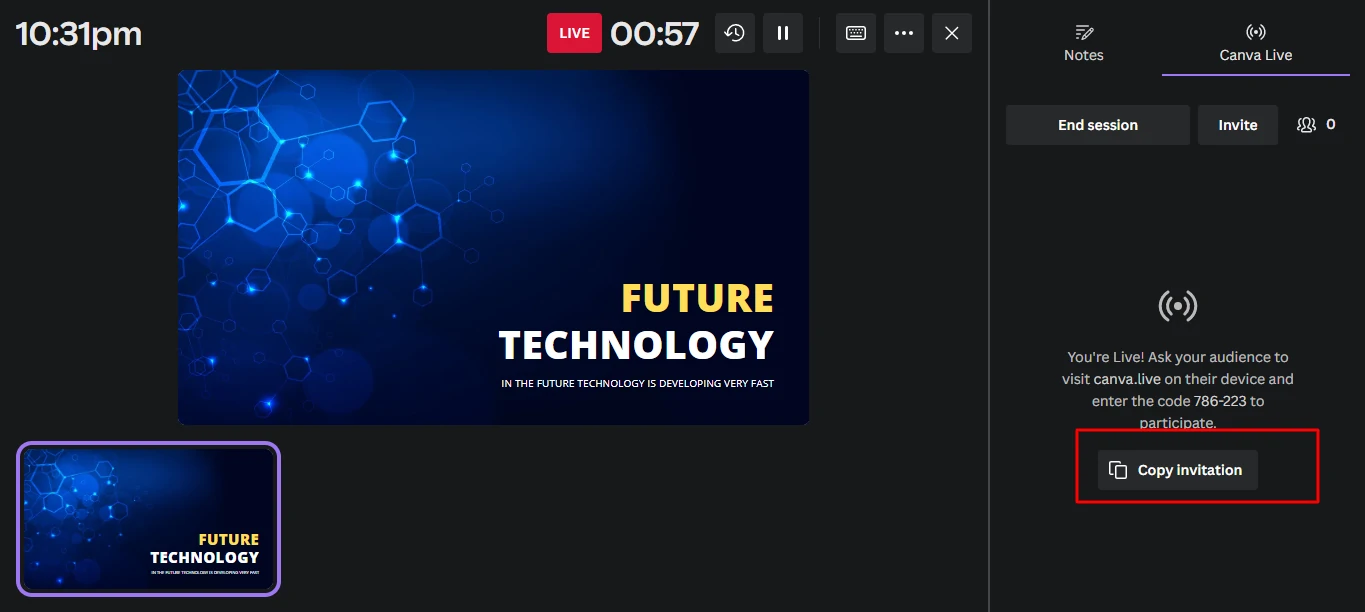
The best thing is that no app or account is required for your viewers to view your live broadcast. They may ask queries straight from their browsers. As a result, if you’re a teacher, you may use this Canva tool to hold webinars, Q&A sessions, and other events.
Canva Website Creator
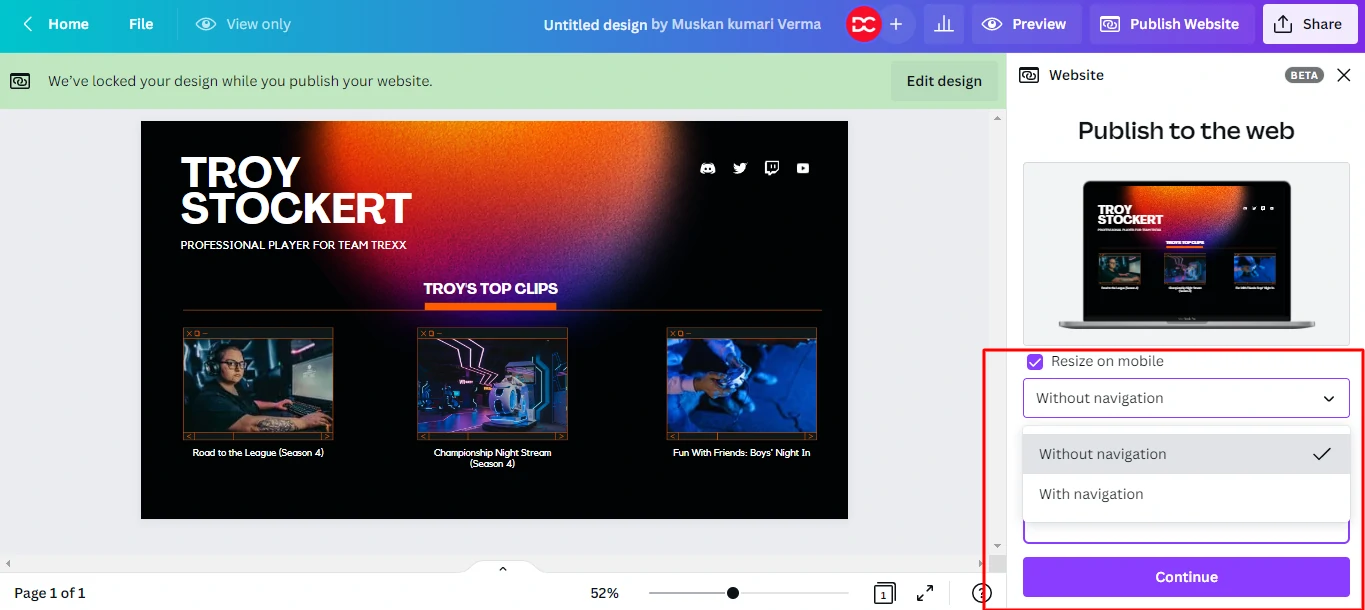
Canva may be used to construct a simple website. Choose any design template from the Business Templates section of the website.
Now, customize the text, colors, photographs, objects, and so on, and add your URL to the website. While downloading, you will be given several alternatives for publishing as a website.
When you press the publish button, Canva creates your website. This is ideal for developing landing pages or portfolio web pages that do not require regular updates.
The only issue is that the Canva URL cannot be changed. You may, however, utilize link-shortening tools to conceal the Canva URLs.
FAQs
Is Canva free to use, or do I need to subscribe to Canva Pro for these features?
Canva offers a free version with basic features, but subscribing to Canva Pro unlocks advanced tools and premium content.
How can I collaborate with others on a Canva design project?
Collaborating on Canva is seamless. Simply share the design with your team, and they can provide real-time feedback and edits.
What are the advantages of using Canva Pro for business purposes?
Canva Pro for Business provides features like team collaboration, brand kits, and additional tools tailored for professional users.
Are the animations in Canva easy to use for someone without a design background?
Absolutely! Canva’s animation feature is user-friendly, making it accessible for both beginners and experienced designers.
Can I export my Canva designs for use on different social media platforms?
Yes, Canva allows you to optimize and export designs for various platforms, ensuring they look great on social media and beyond.
What file formats can I export my Canva designs to?
Canva supports various file formats, including PNG, JPEG, PDF, and more. You can choose the format that suits your needs.
How often does Canva introduce new features and updates?
Canva is committed to innovation and regularly releases updates and new features to enhance the user experience.
Can I use Canva offline, or does it require an internet connection?
Canva primarily operates online, but there is a desktop version that allows you to work on your designs offline.
Conclusion
In conclusion, even if you are not a design expert, Canva is like a magic wand for producing incredible and striking graphics. It is your go-to tool for creating incredibly polished presentations, social media posts, and more.
Whether you’re just starting out or already know your way around design, Canva has something for everyone. The basic version is free and easy to use, but if you want some extra fancy features, there’s Canva Pro.
Remember to play around with things like fonts, colors, and pictures to make your designs pop. And don’t forget to check out the amazing animation feature for that extra wow factor.
So, whether you’re sharing stuff on social media or putting together a business presentation, Canvas has your back. It’s like having your design superhero in your pocket!


