We all know how practically useful software OBS is. Definitely, it is one of my favorites when it comes to screen recording. However, for sending the short screen records I always use Awesome Screenshot or Loom. There are many screencasting software in the market such as Streamlabs, Bandicam, and more. But OBS is an open source software and it works on Windows, Mac, and Linux flawlessly.
Enabling the Zoom and Follow feature in the OBS allows you to zoom the screen with a hotkey and the cursor follows the zoomed window. The steps are not that easy however achievable if you follow all of them with patience.
Requirements to Enable Zoom and Follow Feature in OBS Studio
Download & Install OBS Studio in your System
Download & Install Python 3.6 in your system
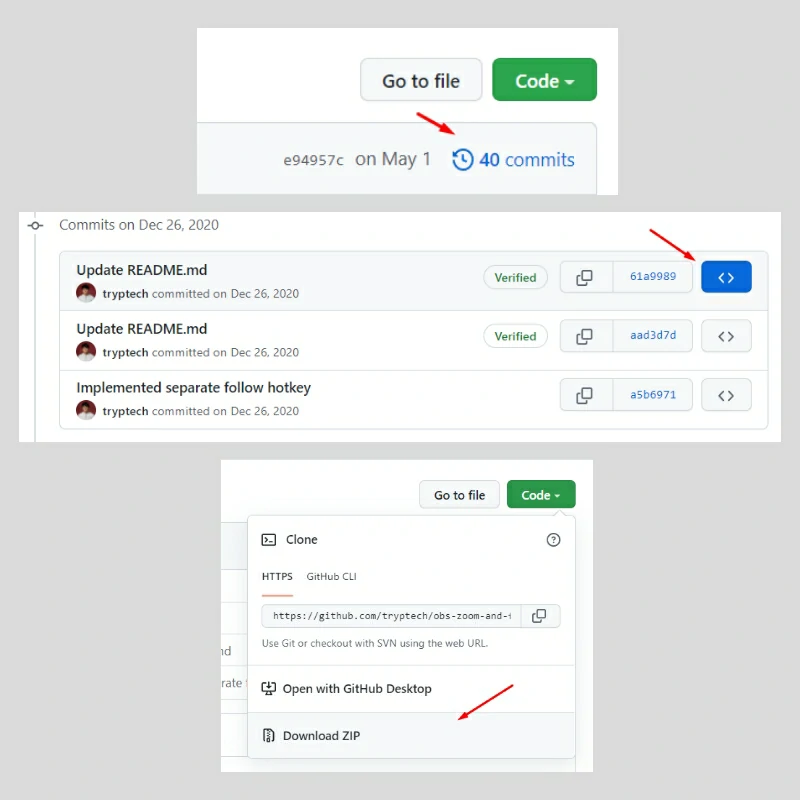
Click here to Download the Zoom and Follow Script, from GitHub. (don’t download the latest version, check the complete article before downloading this)
Steps Involved to setup Zoom and Follow in OBS Studio
Let’s assume that you have downloaded the OBS studio. Now, make sure you download Python 3.6 only. Any other version of Python may give you a “No Properties Available” Error when you will try to use the loaded script.
After installing use the below command to check if it is installed. If the python is installed properly you will see the version.
python --version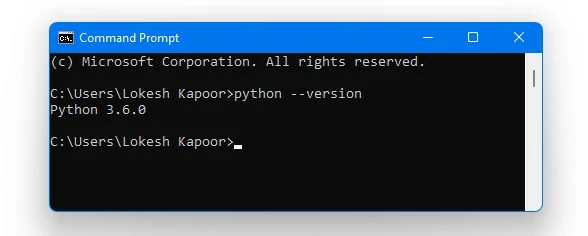
If you get an error like “Python is not recognized as an internal or external command” you will need to set the python installation path to system variables.
To do this, navigate to System Properties> Advanced > Environment variables.
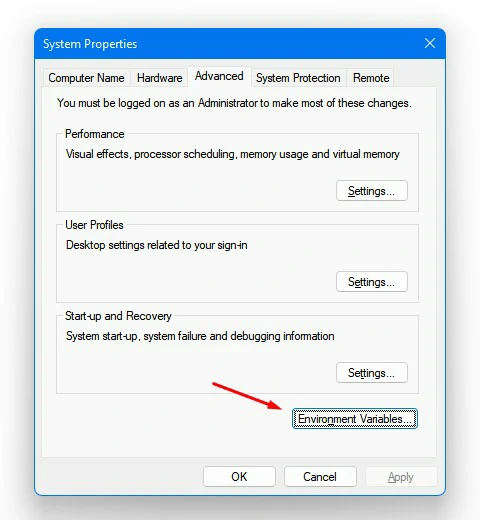
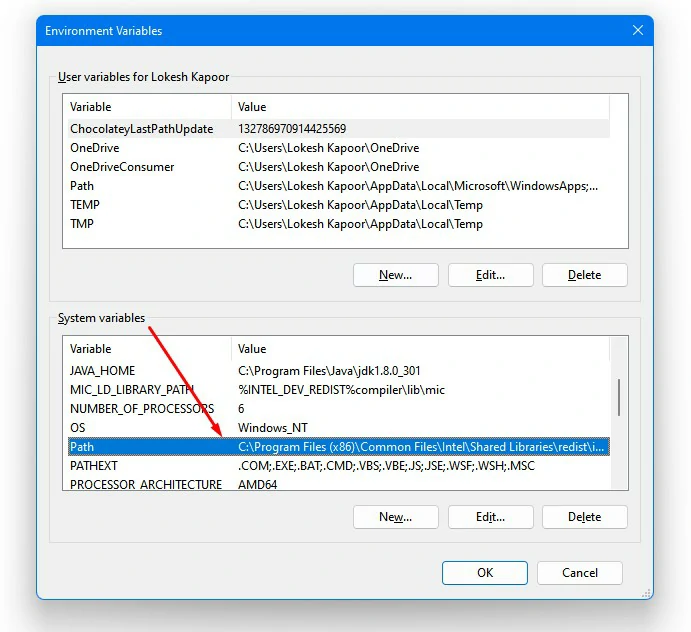
Edit the System Variables > Path and add a new row. Simply put the Python installation path. Add one more row to add the path to the scripts folder which is just inside the main folder.
Your installation path may look something like the below:
C:\Users\USER\AppData\Local\Programs\Python\Python36You can find the installation path by using the below commands in the Python interpreter:
import os
import sys
os.path.dirname(sys.executable)
Click here if you did not find the path and want to know more about how you can find the installation path. Once the installation path is set in the system path variables you can now see the version of python and commands would work.
Install the Dependencies – pynput and screeninfo
Open CMD and enter the below commands to install the dependencies. In case you get an error make sure pip is installed.
python -m pip install pynputpython -m pip install screeninfoNow go to OBS Studio (Run it with administrator access to avoid any other issues) > Add a display capture source in your scene.

Go to Tools > Scripts > Python Settings and browse the Python installation path here.

Now download the script of the previous date, because the latest version of the script is not working for many users.
Now go to Tools > Scripts > click plus icon to add Script > Select python file from downloaded script and open it.

Now you can see the below settings to make adjustments.
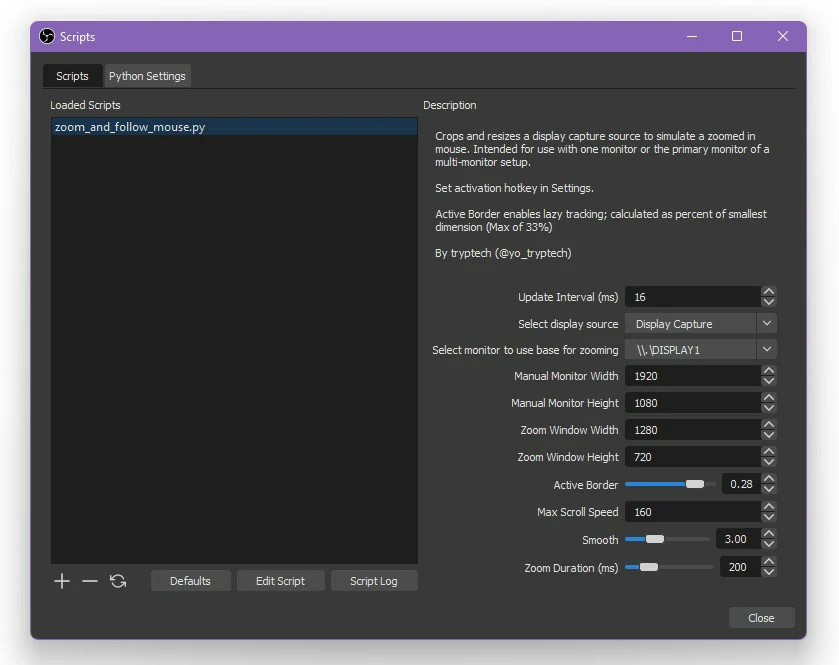
- Select the display source that you had added in the scene
- Set the Monitor Width and Height if it is not correct by default.
- Set the zoomed window height and width
- Active Border decides the ratio about which the mouse will start to follow the cursor.
- You can set the custom scroll speed, smoothness, and Zoom duration.
Now finally, go to OBS Settings > Hotkeys > and set the mouse zoom and follow hotkeys to enable or disable it.

Over to You
So this was how to enable the zoom and follow feature in OBS studio using Python script. I hope you enjoyed it and it worked for you. Let me know in the comments your feedback and suggestions.

